Friday 31 August 2012

Brown & Gold...


Hi

I am so lost with my days – keep thinking today is Saturday – and have no idea as to why!!!
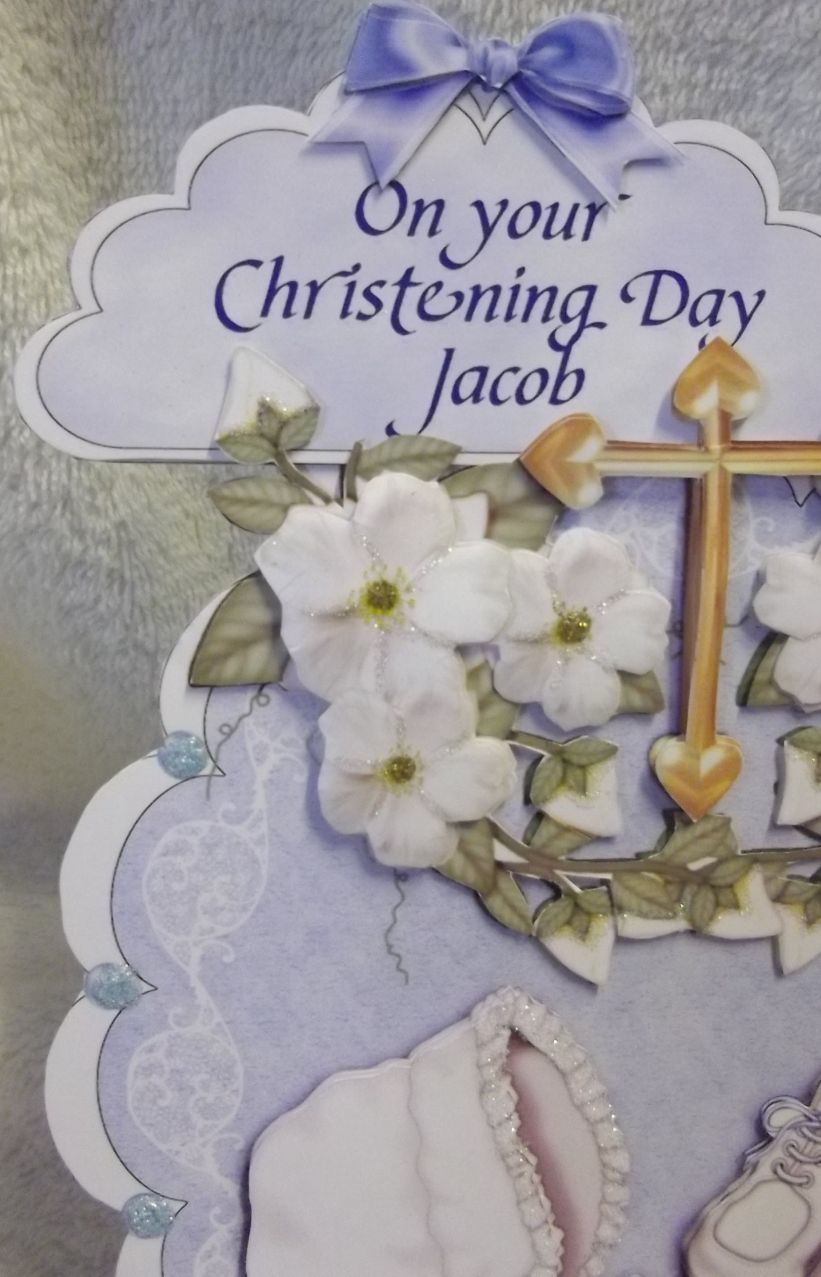
This card is another from craftsuprint but cant think who is the designer

I made several of these up last year too – its not often you find a sheet that will take both gold and silver at the same time is it?

I folded my A4 brown card in half to give me an A5 card blank

A piece of gold mirri card was stuck to the card blank with double sided tape

Onto that was my base image

Looking at the card you can see there is a border of each colour

The sheet is great for all crafting abilities as its so easy to cut out – you could simply cut the large panel and the sentiment and it would work well

But I cut out all the pieces and built them up with tiny sticky pads.

As I was layering the bow I shaped it first with my shaping tool then added the sticky pads to it – makes a lot of difference to the finished design in my opinion.

The sentiment was attached onto top of the ribbon

To embellish I used my quickie glue pen to edge the trees and foot paths in the main panel – then sprinkled with iridescent glamour dust

Using the same pen I highlighted the big fir tree, the roof tops and the shadows from the fence and sprinkled with gold glamour dust

How lovely the glitters look next to each other!!!

I used black enamel to create dots of colour all around the edge of the sentiment

Such a pretty card – I adore it and never tire of making it up or seeing it!

See you tomorrow – that will be Saturday then! Lol

x

Thursday 30 August 2012

For Christmas


Hi

Today's card is one Sandie Birchall had on sale on craftsuprint in 2011 and I actually made this up several times for last Christmas but as I didn't share cards then I thought I would make it up again as it really is a lovely card

I printed the sheet onto matt photo paper and cut out all the elements to start with.

I then made up the pyramid design using large sticky pads – I rubbed a Prit Stick over the sticky pads before attempting to line up the layers so it would e easy to take off and try again if I didn't quite line up.

Next I folded a sheet of dark blue card stock to create my A5 card blank

A piece of silver mirri card was glued to the card blank leaving a narrow all round border

The image was then attached to the mirri card with double sided tape.

I used a Sakura quickie glue pen and glamour dust to highlight and sparkle the snowy areas of the design

I love the way the iridescent glamour dust on the christmas tree to the right side of the card actually looks green – it couldn't have worked better had I used a coloured glitter.

The sheet offers several sentiments but I chose a plain and simple Best Wishes for Christmas

As I said this really is a pretty card – the look can be changed by the colour of main card you use and the mirri card – this also works lovely with backing paper instead of mirri card.

See you tomorrow

x

Wednesday 29 August 2012

Perfume!


Hi

Just for a change I am over an hour earlier than I usually come on – its due to the Paralympics opening ceremony coming on shortly and it runs for several hours

The card for today is made from a sheet I had from www.craftsuprint.com and was designed by Sandie Burchall but sadly I don't have a title or item number for it sorry.

I used a4 burgundy card to make my a5 card blank – the corners were then rounded with the corner chomper

A piece of silver holographic card was cut to leave a narrow all round border and the corner were again rounded

Next I cut the main image from the sheet – it was too big to fit the card blank so I trimmed off all the excess borders that were printed on it and made it small enough to fit onto the holographic sheet – the corners were rounded then this stuck to the card with double sided tape

Each panel on the card is made up of shaped pyramage pieces so they were cut and lined up – then added to the card using sticky pads

The sheet offered several useful sentiments but I added a Best Wishes so it could be used for most occasions.

A small bow was tied from pink with white dots ribbon and then attached to the top left corner with a dot of silicone.

I used a quickie glue pen to highlight the centre of the flowers then sprinkled with glamour dust

Finally I used glossy accents on the bottle stoppers to complete this pretty card

See you tomorrow

x

Tuesday 28 August 2012

Love The Shoe


Good Evening Friends

Well the craft room is almost gaining some normality – have got rid of more bags to the wheelie bin, and took a huge amount to class tonight – the ladies love a bargain – and the ladies on Thursday will get to have a good rummage too

I didn't sleep last night – not sure if it was because I had this room on my mind – knowing it needed to be sorted and put back again as soon as possible...

I ended up getting up at just before 3am – crazy I know – but on the bright side I got to make cards from the many cut out and stuck together images

Today's card is a super card – I have made this and variations of it many times for all manner of occasions too

The backing sheet and the shoe are designed by Jak Heath who very kindly shared the instructions and sheets on her blog a few years ago

So to make the card I started by folding a matt black sheet of A4 card in half to create the A5 card

I cut a piece of bright red card and matted it to the card blank.

Next I cut a piece of silver holographic mirri card – slightly smaller and stuck that to the mirri card

Onto the black card that is clearly seen in the photo – it is Tapestry Card from Joanna Sheen – I cut this slighter smaller again to fit on top of the silver mirri card

Using an EK Success deep border punch I punched a general design to fit across the top and bottom of the black card – I did the borders in the same silver mirri card and black & white Damask paper.

The paper was stuck onto the silver punched border and then these were placed along the top and bottom of the card

Next I cut out the shoe and matted it onto a piece of the holographic mirri card and cut that out – I used thin sticky pads to attach the shoe to the left side of my card

After cutting out the sentiment I matted it onto silver holographic mirri card then red – large thick sticky pads were used to attach this to the right of the card

To finish I used a quickie glue pen and glamour dust to highlight the large decoration on the shoe and either side of the sentiment panel.

Glossy accents was used inside the circular decorations and a bow made with white with black dots ribbon was then added below the sentiment to finish

I think this card is suitable for most occasions – its great to make as only the shoe and sentiment to cut out so great for allowing the imagination to run wild...

See you next time

x

Monday 27 August 2012

Christening GET


Hello

I am still up to my eyes in chaos!! Oh how I wish I had never started this huge task of clearing out the craft room in order to bring the over spill that is filling the room that should be Petes space!!! Just when I think I have made a big dent in it – I discover yet more that has to be sorted!

The wheelie bins are at over flow point – have given bag loads to someone through free-cycle

Have boxes and bags of stuff that I will be taking to class...its just endless

All I want to do is craft – is it really too much to ask for? Seems yes is the answer for now!!!

I have been making this christening card for our post mistress for what seems like weeks now – but at long last its completed – well apart from an envelobox which I will get made in class tomorrow.

So I used a Giant Easel Tableau kit by Valerie Dawes – simply called Boy's Christening

I printed off the 6 sheets and then roughly cut out several of the pieces – mainly the base sections that needed extra support – I sprayed them with Crafters Companion Stick & Stay then stuck to pale blue card stock and cut out properly

I scored all the tabs and cut the 2 slits in the main base

With this kit I remembered from making it before – the cross that fits on the back section is actually too big for the sentiment section – it covers the text – so I got round it this time by cutting the top of the cross down slightly – I think it looks ok – do you agree?

All the decoupage was completed before I put the card together as there were so many tiny pieces to it....

The main back piece just wouldn't stand upright so I made a small tab and added a piece of Velcro to that and the base – it works perfectly!

For decoration I used several Stickles Glitter glue – for the centre of the flowers, around the base and main back section edges

I then used a Sakura quickie glue pen and glamour dust to highlight the edge of the bonnet and shoe laces.

Once it was all put together I stuck the verse underneath to finish

I am sure this will be well received by the post master & post mistress and the family they give it to.

Be back again tomorrow

x

Sunday 26 August 2012

A Lilac Birthday


Hi

I had a fairly good nights sleep last night – but woke with a start when I heard a dog barking – frightened me to death even though I was safe in the house – I'm sure it will take quite some time to get over it..

I had all thoughts of making cards this weekend but then our plans don't always go as we would want them to...and mine have strayed well off track

Instead I set about sorting out this place I lovingly call my craft room – it looks pretty tidy most of the time but I know it is far from it

So I started by taking all the lovely storage boxes off two shelves – and yikes – I knew it was stacked up behind them but didn't realised by how much....so after around 7 hours I have only managed to sort out 2 of the 8 shelves I need to do - lets hope the next 6 are easier!

And on to the card – I have several in a file waiting to be shared but yesterday when my daughters came they were looking for a card for grandson Layton to tale to a little girls party today – although I have dozens of cards made up there wasn't anything that took their fancy so I said they should just make one themselves

And they did!

They had a rummage through my folders and short listed around 8 sheets so I printed them all for them and Nicky sat and made this card up while she was here

I was so pleased with it I took photos and asked her if I could use t for my blog – she said yes,

I have no idea as to who may have designed the sheet but I am 99% certain it came from www.craftsuprint.com

To make the card Nicky first folded an A4 white sheet of card stock in half to form an A5 card blank

She cut the base layer out and stuck it to the top of her card blank which left a wide border at the bottom

She built the pyramage up using medium sticky pads – this is easy to cut as all straight lines – she rubbed the sticky pads with a glue stick so she could lift up and re-position if it wasn't quite lined up right.

The Happy Birthday sentiment could have been placed anywhere on the card but she simply placed it in the biggest blank space

She decorated the card with Stickles glitter glue so she could match it to the colour of the image

To finish the card she used metallic purple card candy along that bottom wide border

I am so pleased with the finished card – and I know the girls were too – got them into the mood for crafting as I think they went on to make up all the sheets and kits I had printed for them!!!

Hopefully you will get something from me tomorrow...

x

Saturday 25 August 2012

I Don't Do Exercise


Hello friends

For those of you who heard of my dreadful experience this morning I would like to say a huge thank you for all the emails and text messages...

I am feeling much better now but my hands are still shaking terribly – and I don't think I will get over the fear of seeing a dog roaming...

So to the card for today...

A great comical card for any man with a sense of humour – oh hang on...are there such things as men with sense of humour? Lol

The sheet is another from www.craftsuprint.com

The sheet number is 345766_1209 and was designed by Carol Smith

To make the card I used a sheet of A4 black card which I folded in half to create my A5 card blank, I then sprayed the card front with Radiant Rain Shimmering Mist and the colour was Pearl Lilac

This is an amazing product as in the bottle its a milky white liquid – it has to be well shaken to mix up the mica in it – then when its sprayed onto black or any dark card it gives a wonderful lilac shimmer when the light catches it.

I cut the base image and then punched the 4 corners using a Martha Stewart Optic Dot punch – the image was then stuck to the card blank with double sided tape

I built the decoupage layers up with medium sticky pads and the I don't do exercise panel was stuck in place using large pads.

To embellish the card I first used a ruler and Sakura quickie glue pen and drew in the lines of the background so you see diamonds – then I sprinkled glamour dust over the lines.

I used a thick PVA glue for the head of the beer then covered with glamour dust again

The hair and glass were glazed with glossy accents.

To finish the card I used newsprint card candy – black with white print in the 4 corners and white with black print across the ribbon.

The sheet also had a Happy Birthday sentiment but I haven't added it as the card would be a fun card to send to anyone for any or no0 reason!

See you next time I hope

x

Friday 24 August 2012

Birthday Tag


Hi

I spotted this lovely sheet in one of my folders so decided to make it up


x
IF ANYONE CAN TELL ME WHY I HAVE ALL MY TEXT UNDERLINED YET THE UNDERLINE TAB IS NOT TOUCHED I WOULD BE SO GRATEFUL! THANK YOU

Thursday 23 August 2012

All Silver & Blue


Hi

Today I am sharing a card that I made up last week

Its another of the lovely Christmas cards – bought from www.craftsuprint.co, but not so sure who designed it – there are just so many that are similar on that site these days

I have always been an A5 card maker but have to say I am loving making the 8x8 cards now and with the way the postage is charged these post the same as an A5 anyway.

I used an 8x8 scalloped edged card from www.craftworkcards.co.uk I think they are around £8 for 20 or 25 cards with envelopes – I did get a good deal at he Crafting Festival where it was any 3 packs of 8x8 cards for £15 I think – but bought so much I could be wrong with that price – I just recall it was too good to miss so grabbed them quickly!

So as the sheet was all in blues I used the lovely limited edition Tim Holtz distress ink pad Salty Ocean to colour all the edges

Left the card to dry for a while and set about cutting the sheet out

There isn't a great deal of decoupage to be cut out of these sheets – it was just a few of the flowers which was a little disappointing as I really expected to have the baubles to decoupage too

I stuck the main image to the now dry card blank – it fitted perfectly against the scallops

Then it was down to adding the decoupaged flowers

They were fixed in place with small sticky pads

The top layer was shaped with a shaping tool before been added to the card

So far I haven't added any embellishments – I had my glossy accents on order so decided to wait for that so I could do the glossy bits and the gems all in one go – then add glitter before fixing the insert

That's another lovely christmas card to my growing collection

See you next time....

x

Wednesday 22 August 2012

Lilac Rose With Organza


Hi

This is a card that I made when I found out a special lady had been poorly

I bought the sheet from www.cardmakingdownloads.com and it is called Lilac Rose In An Organza Frame – it was designed by Judith Howells

It is such a pretty sheet and suitable for birthday, get well, well done or just a hello card

To make up my card I used a very dark purple card stock which was cut down to a 6x6 card blank

A piece of silver mirri card was cut so it left the narrowest all round border – the corners were rounded using the corner chomper before sticking the panel to the card front with double sided tape

The main image was cut out – I actually cut this down quite a bit so it would fit onto the card – so once I was happy with the size I rounded the corners and stuck to the silver mirri panel again leaving a border all the way around.

All the decoupage was cut out – on the whole it was quite easy to cut out but there were one or two tricky sections were care was needed.

Tiny 1mm double sided sticky pads were used to add the decoupage to the card

I shaped the top most pieces before adding

The butterflies were attached just along the body so that the wings remained free – once they were shaped it gave the appearance of a butterfly in flight

Using a Sakura quickie glue pen I went along the edges of the roses and butterflies then sprinkled with glamour dust.

A simple Get Well Soon was added to the bottom right hand corner to finish

I sent this off some time ago and haven't heard anything as yet but I am pretty sure it must have arrived

Hope you like the card

More tomorrow,....