Sunday 30 September 2012

Red Christmas


Hello...

Well it would seem winter is certainly on its way if today is anything to go by – mind you it is what we in Hull always call “Hull Fair Weather” that's because we have the travelling fair – is said to be the biggest fair in Europe – and it visits us here in Hull the start of October and its always wet, windy and cold!!!

Lets just hope we get days that are drier and a tad warmer for a few more weeks yet as winter is long enough!

The card I have decided to show today is a beautiful one – the artwork is stunning – sadly I don't know who designed this sheet but I do know it came from www.craftsuprint.com I did try to spot the sheet but after searching around 1500 sheets I gave up!


So materials for this card I used ….

Heat mat to work on and protect your surface – I always use it...

Scalloped edged 6x6 card blank

The printed sheet

Tim Holtz Distress Ink Pad – Shaded Lilac

Ranger Cut & Dry

Sakura quickie glue pen

Glamour dust iridescent glitter

Glossy accents

Double sided tape

Sticky pads

Eazi Score Board & tool

Tonic 8” guillotine

Scissors

Tweezers

Shaping tool from www.dimensionstamps.com

Foam shaping mat – stamping mat or even a mouse mat

To make the card ...

I cut a piece of Ranger cut & dry to about 2” square and rubbed it across the Tim Holtz Shaded Lilac ink pad until I had a good coating of colour

The scalloped edged card blank was folded and placed on the heat mat, I started just off the card and using circular motions made my way onto the card and continued all the way around the card until I was happy with the colour – I just rubbed over the ink pad on a very regular basis to get it done.

I only actually inked the outer edges as the centre of the card was to be covered.

I cut out the pieces on the printed sheet – then using double sided tape around all the sides I stuck the main base image to the centre of the card – this left the lovely lilac order showing.

The beauty with this sheet is there is very little decoupage to be cut out – its was another panel which is a lovely shape and the ribbon...

The shaped panel had large 2mm sticky pads fixed to the back and the panel sat centrally on the base image.
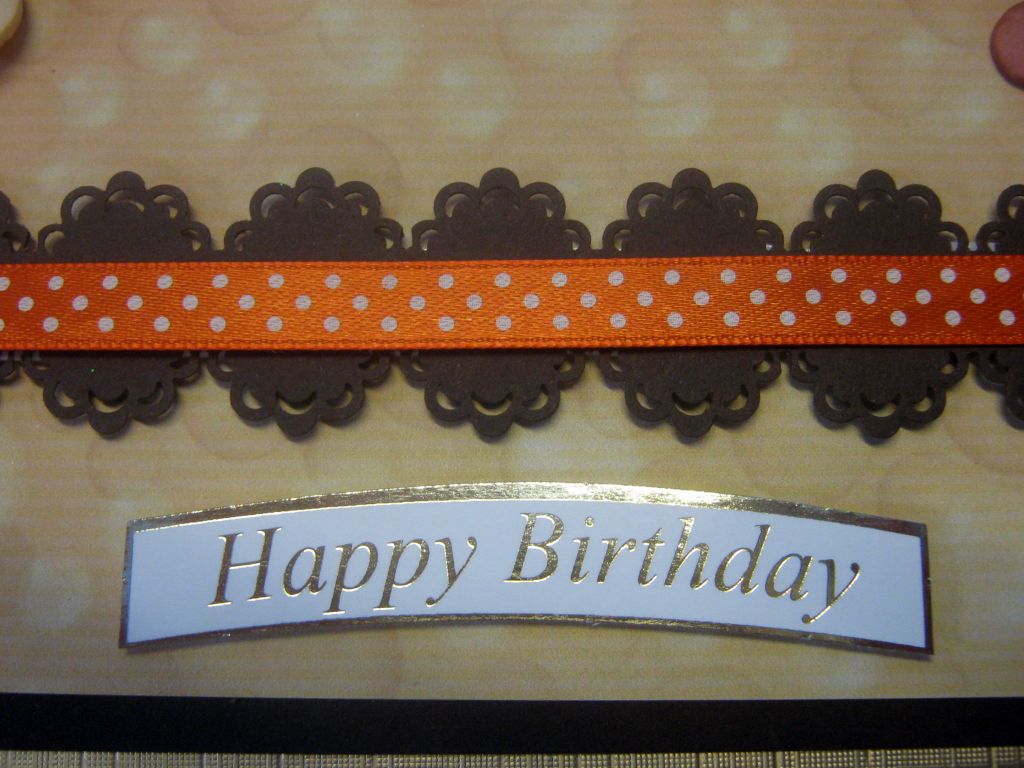
The pretty red paper ribbon was cut out and positioned just below the shaped panel using small 2mm sticky pads

A simple gold foiled sentiment was attached over a section of the ribbon with a large sticky pad

Then it was time to decorate and I did this with the quickie glue pen – highlighting the many snowy areas especially the tops of the wooden fence at the front of the card.

Well I dont know about you but I think this is a super card that could be sent to anyone of any age – and can be made year after year but by changing just the card blank it could look very different every time!

I do hope you are enjoying this new look in the way I am showing the cards – a little chatter to start followed by list of materials used and then the method...I was just aware that there are still lots of people new to card making that may stumble upon my blog and by being as thorough as I can in what I used and how I did it I do hope it will encourage not only new card makers but all you loyal followers to have a go!!

I would love to see the cards you make too...

See you tomorrow

x


Saturday 29 September 2012

Birthday Boy


Hi..its me...again!!!

We have been doing some decorating...don't know why I say we as its been down to hubby – I just sit and complain...what's new eh?

Well for today's card I'm sharing another from the lovely cd I mentioned a few days ago...its A Year In Cards by Ellas Design – this is the link to her website www.ellasdesign.co.uk

I actually popped over to the website and bought one of the card kits the other night – she has some great ones on offer... you really need to have a look at the horse kit...I'm saying no more....

So materials for this card I used ….

Heat mat to work on and protect your surface – I always use it...

Bright red A4 card stock

2 sheets of printed design sheets

Versamark clear ink pad

WOW clear embossing powder

Heat gun

Glossy accents

Double sided tape

Sticky pads

Eazi Score Board & tool

Tonic 8” guillotine

Scissors

Tweezers

Shaping tool from www.dimensionstamps.com

Foam shaping mat – stamping mat or even a mouse mat

To make the card ...

I created my square card by scoring my a4 red card on the eazi score board line 7 then swung the card 90 degrees and scored on line 7 again.

I folded the card on the first score line and used the bone folder to ensure I had a clean crisp fold then used the guillotine to cut off the excess from the 2nd score line I did

This gives me the perfect square card

The base layer was cut out then double sided tape was used to stick it to the centre of the red card blank – I didn't actually remove the backing paper from the double sided tape on the right hand side yet...more will be explained further down

The next piece to be added was the shades of blue plaid type paper which went across the centre from the left side to the right side, again I had used double sided tape

A sheet of backing paper that is printed with circles and edged with burgundy borders was fixed at an angle on the card front using the DST again....

And now I have the image sheet – the Birthday Boy – so I put 2mm thick sticky pads all over the back and then positioned this in a straight position slightly over to the left hand side.

Before I added the decoupage to the image I took the pop over flap and attached some of it under the 1st layer – it was positioned so the grey border of the flap was a little above the green border on the plaid panel – I used a small strip of double sided tape to hold it then removed the backing from the tape of the base layer – I said in the 1st part of the how to make it that all would be explained!

I had a circle of decorated paper that was to represent a brad so I dabbed a Versamark ink pad over it then covered with WOW clear embossing powder and heated till it melted – dipped into the powder again and reheated – I did this once more then put the glossy brad on the heat mat to cool for a few moments

While I was waiting I added the decoupage to the card front using tiny 1mm sticky pads – I used a shaping tool and foam mat to make the ball look circular this was easy to do – simply pop the ball white side up printed side down on the foam mat – using a shaping tool use circular motions all over the back of the piece until you can see it has curled – I popped a single sticky pad in the centre then turned it over and stuck on the football of the sheet.

I thought about adding glossy accents or maybe even glitter but decided it really didn't need any – just having the very shiny brad works so well don't you think?

I hope you have enjoyed seeing the card and reading just what I used and how I did it...
Now I suggest you jump on over to Ellas place and browse her amazing stuff...
See you tomorrow

x


Friday 28 September 2012

Teddy Shaped Card


Hello again and a big thank you for popping in again to see what I have on offer today!

Its another card made from a kit I bought from the very talented Lyn through her website which is


The kit included the main card sheet, the insert sheet, back and front envelope sheets and 2 – yes 2 sheets of decoupage for just 75p....I only used half of the decoupage which means I get another card made from what is left over so even better value for money...check out Lyns website – you will be amazed at just how much stuff she has on there – oh and this kit is called Shaped Cards Set 80

So materials for this card I used ….

Heat mat to work on and protect your surface – I always use it...

Bright red A4 card stock

6 sheets of printed design sheets

Sakura quickie glue pen

Cosmic Shimmer PVA

Glamour dust

Glossy accents

Double sided tape

Sticky pads

Crafters Companion Stick & Stay

Eazi Score Board & tool

To make the card ...

I roughly cut out the main card from the sheet – turned it over and evenly sprayed the Crafters Companion Stick & Stay over the back, left it for approx 30 seconds then popped it onto the bright red card stock and carefully cut out the card.

Next I used the eazi score board to score down the card on the fold line, creased it well then opened it again and added the blank insert to the right hand side – I have lots of lovely christmas verse rubber stamps which was why I didn't add a verse before printing out.

I know there is a piece of decoupage to fit the reverse of the card front but I decided not to use it as I liked the bright red card showing – it looks so cheerful.

So now its down to cutting out the decoupage – as I said at the start of this – there are 2 sheets of decoupage so I just used alternate layers so it works out ok for the 2nd image – it doesn't matter there is no base image as this will work just as well as a standard card using a backing paper.

I layered up the decoupage using double sided sticky pads.

Once I had as much decoupage as I wanted I began to embellish it

I used the Sakura quickie glue pen to highlight where I wanted to add a light sprinkling of glamour dust but where I wanted a thick covering – like on the pompom I used the Cosmic Shimmer PVA then covered with glamour dust.

Glossy accents was used on the gold ribbon of the parcel, the red berries and the eyes and nose of the cute bear.

The envelope was simple to make up – I cut out the 2 pieces and scored using the Eazi Score board on all score lines, then folded and sharpened the score lines

A wide double sided tape was used to attach the 2 pieces together


I do hope seeing this card has made you want to pop over to Lyns website and check out her sheets and kits....just be warned – the prices are low – quality very high – and so many to chose from I know you will be back again and again that's how come I have so many and still go back often...

See you tomorrow

x

Thursday 27 September 2012

Christmas Wreathe


Hello

Today the card I made is from a wonderful cd called “A Year In Cards” it is by Ella Designs

If you havent heard of these cds I really cannot recommend them enough

This is her 4th cd – and I am so pleased to own them all – take a look at her website


So materials for this card I used ….

Heat mat to work on and protect your surface – I always use it...

Hunkydory foiled card stock

2 sheets of printed design sheets

Red stickles glitter glue

Glossy accents

Double sided tape

Sticky pads

Eazi Score Board & tool

To make the card ...

I scored and folded the card in half – that's line 7 (A4 half fold) on the Eazi Score board then turned the card 90 degrees and scored on the same line again – this gave me my square card – its a tad short of 6x6 – oh the piece left over from your score score line needs to be cut off – that's where the square card came from.

I cut out all the pieces to my card and started by using double sided tape on the back of the main piece of the design, its the spotty piece, and sticking it centrally on the card blank.

The holly designed piece was next to be put in place but I used sticky pads to it to give a better effect.

After that it was the plain white panel with inverted corners, this was placed over the holly paper using double sided tape...I made sure it was centralised so it left an equal border.

Next I took the paper ribbon strip and attached it across the card so it covered the centre of the mat and layered sheets – I used double sided tape across the centre but sticky pads at each end so it was even all across.

After cutting the wreathe out I added small 1mm double sided pads to the reverse and this was attached to the cad over the paper ribbon band – the white sentiment greeting in the centre was on the sheet like that.

Then it was simply add the decoupage that made up the ribbon and baubles, I used small sticky pads to add this

To finish this lovely card I used red stickles and carefully added a tint blob to the holly backing

Then it was glossy accents to the pine cones and baubles.

When the 2 sheets were printed it also had a main card that was fully useable too so I ended up with one flat card that I just added glitters to and then this card so great value all round!

I do hope seeing this card has made you want to pop over to Ella's website and check out her cds....as I said I have them all and they are all lovely!

See you tomorrow

x

Wednesday 26 September 2012

Crackerbox Mice


Hello

I received my copy of Debbi Moore's Crackerbox Mice this week and I love it!

It is very different from the cds Debbi usually makes which was why I decided to order it

You can get the double cd rom from Create and Craft or direct from www.debbimoore.co.uk

So materials for this card I used ….

Heat mat to work on and protect your surface – I always use it...

White A4 card stock

Printed decoupage sheet from cd

Backing paper from cd

Brown card stock

Gold patterned card stock

Small scrap of dark red card

Assorted daisy type flowers

Brads for the flower centres

A piece of orange spotty ribbon

Tonic border punch

Gold corner peel off's

Sentiment

Glossy Accents

Double sided tape

Sticky pads

Pinflare Gel

Eazi Score Board & tool

Corner Chomper tool

Crafters Companion Glitter Spray


To make the card ...

I scored and folded the card in half – that's line 7 (A4 half fold) on the Eazi Score board then scored the front panel on line 4 (A4 gatefold) to create the basic stepper card.

On the top piece of the stepper I measured along the fold approx 2” (5cms) from the outer edge in on both sides – then drew a line from fold to edge and cut this away to leave the easel just in the centre of the front as shown in the photos.

Working on the base of the card I added a piece of patterned gold card to fit, trimmed the excess and the rounded all 4 corners

Next I trimmed a piece of brown card to leave a border all around and rounded the 4 corners – then using double sided tape attached this to the card base

The backing paper was then cut down and had the corners rounded and fixed it in place.

Using a length of brown card I punched a border along one side – turned it round and did the same at the other side

The length of orange ribbon was placed over the punched border and secured at the back – this panel was then stuck to the card base using thick sticky pads – I positioned it about 1/3rd up from the front of the card to act as the stopper.


After rummaging through the oddments of flowers I made up 2 clusters of foam and glitter papers flowers that were held together by brads...pinflare gel was used to secure a flower to the top left corner and the other just above the stopper at the right hand side

I finished the base by adding an odd Happy Birthday sentiment


For the now small easel I covered the lower part with backing paper

After cutting the image and decoupage pieces I stuck them all together using tiny sticky pads.

I matted the base image onto a scrap of dark red card – as usual I made sure I had an equal border showing between each layer.

I stuck this panel to the bottom piece of the scored easel then used the Crafters Companion glitter spray to cover just the decoupaged section.

To finish I added very fine gold peel off corners to cover the red and yellow layers of the design and then 2 slightly bigger ones were added to the main image top corners.

I had heard people saying they really didn't rate this cd but I disagree – I think its lovely...and looking at the card I made – don't you?

See you tomorrow

x

Tuesday 25 September 2012

Spooky....


Hi

Today I am sharing one of a few Halloween cards I have been asked to make.

As its not something I have made before I was a little stuck so it was a trip to

www.cardmakingdownloads.com armed with a 10% off voucher and bingo...I found a few that appealed to me

This is called Have a Spooktacular day and was designed by Deborah Lauder

It was a sheet to make up a 5x5 card but I did something different with it!

So materials for this card I used ….

Heat mat to work on and protect your surface

Black A4 card stock

Orange A4 card stock

Eyes in the dark backing paper

Printed sheet

Glossy Accents

Double sided tape

Sticky pads

A bought pumpkin tag

2 googly eyes

Orange button and thread

Geared Border Punch by Craft Tonic


To make the card ...

I started by folding the black card in half to create my A5 card blank

The orange card was measured to fit the card front leaving a narrow border – then I used the Tonic border punch along the top and the bottom of the card and stuck in place with double sided tape.

I found a sheet of black backing paper with eyes in the dark – it was from an old book of Halloween papers by DoCrafts – it fitted the theme of the card perfectly so I trimmed it to fit on top of the orange card leaving borders and stuck with double sided tape again.

After cutting the image from the sheet I matted it to a piece of the left over orange card and trimmed to leave just a narrow all round border – I stuck it in place the stuck the whole topper to the card front at an angle

Next I built the few pieces of decoupage using small double sided sticky pads.

To finish I added 2 tiny googly eyes to the card – these were stuck with Cosmic Shimmer PVA glue

A small orange button was found in my button box and it was helped with having thread already on it making it look as though I had really stitched the button on.

A bought pumpkin tag had a length of orange organza ribbon threaded through then a large sticky pad on the back – I stuck it under the topper again at an angle


I am pretty sure Ann will be pleased with Halloween card number 2...we may get to see Halloween card number 3 tomorrow....the ladies in class got to see them all tonight

See you tomorrow

x

Monday 24 September 2012

Vampire Greetings!!!!


Hi

Today I am sharing one of a few Halloween cards I have been asked to make.

As its not something I have made before I was a little stuck so it was a trip to

www.cardmakingdownloads.com armed with a 10% off voucher and bingo...I found a few that appealed to me

This is called Vampire Greetings Shaped Card and is by Card Buddys and reasonably priced at £1.45 especially as it contains the main card, choice of several inserts, 2 sheets with decoupage and greetings, a backing sheet and 2 sheets for the envelope!!!


So materials for this card I used ….

Heat mat to work on and protect your surface

Black A4 card stock

Printed card base

Glossy Accents

Double sided tape

Sticky pads

Crafters Companion Stick & Stay

To make the card ...

I roughly cut the base sheet out then sprayed the back with Crafters Companion Stick & Stay, waited the 30 seconds they recommend then popped onto a sheet of black A4 card.

I cut out the base card and scored along the centre line

At this stage it is better to check that when the card is closed the back and front of the card are all cut properly.

I did consider printing the backing paper and adding to the card but decided the black card looked striking so was a shame to cover it up.

The insert was carefully cut out and just like the main card I scored on the score line then checked the front and back were all lined up

The insert was then stuck inside the card using a small piece of double sided tape along the fold line.

Now I started cutting the decoupage out – it was easy to cut out so great for any age group – once it was all cut out I shaped the top pieces slightly then added medium sized sticky pads to the back of all pieces of decoupage

After removing the backs of the pads I built up the decoupage.

Once it was all done I added glossy accents to the beady eyes and fangs then the bat and top of the pumpkin

The card was put to one side for a few hours to dry completely

I cut the 2 sheets out that make up the envelope and then scored all the fold lines

Added a length of double sided tape to all tabs except the main fold of the envelope – when I removed the backing I ran a Pritt stick across the sticky which gave me the option of lifting and repositioning if I didn't get it right

Once I was happy it was in the right place I simply pressed down the seams with my finger


I am pretty sure Ann will be pleased with Halloween card number 1...we may get to see Halloween card number 2 tomorrow....

See you tomorrow

x

Sunday 23 September 2012

Christmas Carollers


Hi

This is another of the cards I made up while at Malham – I bought it from www.cardmakingdownloads.com but cant find the sheet to see who designed it sorry – I seem to be doing that more often these days – think I might have to start popping a post it note on the finished card with the info..

So materials for this card I used ….

Heat mat to work on and protect your surface

6x6 white scallop edge card blank

The printed sheet

Narrow double sided tape

Sakura quickie glue pen

Glamour dust

Glossy Accents

Blending tool and pads

Tim Holtz distress ink pads in blue, green and yellow

A scrap of gold mirri card for the sentiment

Card Candi in blue and white with silver dots

To make the card ...

I folded the white card blank in half lining up the scallops – then using a blending tool I used the distress ink to colour the scallops by using a circular motion – I start on the heat mat and work towards the card so I don't end up with patches of deep colour.

I used green, blue and yellow pads – not in any order – it was just the mix to get a colour that I liked – you might like a different set of colours altogether so play – use a sheet of copier paper and play..its great fun – and you could even use what you played at for your cards as a unique backing sheet!

Next I cut out the main image and using double sided tape then a line of PVA I stuck it to the card leaving an even border all round the card.

The panel was next to be added and this was with large sticky pads but they were just 1mm thick

The decoupage was all cut out and added using the same sticky pads but cutting down where needed.

That was the card all put together – so next I trimmed the sentiment and stuck it to the scrap of gold mirri card with double sided tape, this was placed across the top left corner at an angle.

To embellish the card I used the quickie glue pen to edge the snowman and the fluffy furry parts of the hats and scarves then sprinkled with the glamour dust.

Glossy accented were used on the parts of the mouse and the bears

White with silver dots card candi was added to the corners of the white shaped layer and pale blue were added to the 4 outer corners and also the points of the largest shaped layer


And that's another finished card!!

What do you think to what you have seen so far?

See you tomorrow

x