Monday 29 July 2013

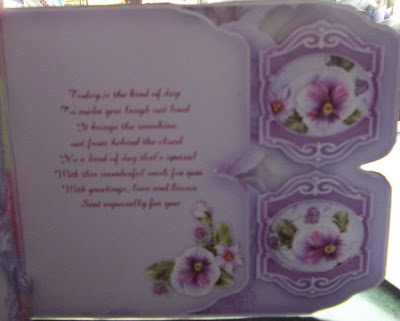
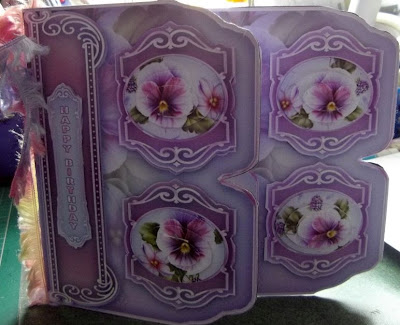
Side Fold Pansies

Hello again
Today's card is another that we have done in the class recently
Not too sure of the name of the kit – nor who designed it but its very pretty
I have called it side fold pansies which I think could be the correct name
Anyway to make this card I roughly cut out the main sheet then sprayed the back with Crafters Companion Stick & Stay and secured the sheet to purple card
The score lines were creased then the 2nd piece was stuck so it was back to back
I then carefully cut out the card shape
Occasionally I found the side I had facing me was cut correctly but when I looked at the reverse it still had white showing so I had to keep on chipping away at it until eventually I had the design front and back the same.
I then cut out the sentiment and attached it to the blank plate with sticky pads
The pretty ornate designs were cut out and again using sticky pads they were attached to the edge of the card
The oval pyramage was cut out and stuck to the inside of the ornate designs.
I added a sentiment to the insert prior to printing the mini kit and although the photo is blurred it looked lovely
All that remained was to decorate the card – I added several strands of assorted fibres to the spine as in the odd place the paper had cracked when scored and the fibres hide it a little
Although you cant see in the photos – mainly because I decorated after the photos were taken, I added a touch of glitter to the flowers to set them off.
I also used gems in places and glossy accents
Shame I didn't take a photo of the finished card – that is when it was embellished.
Never mind
I know the explanation is pretty short with this card but there really wasn't a great deal to the kit
Having said all of that – I do hope you like the card
See you again soon
x
Sunday 28 July 2013

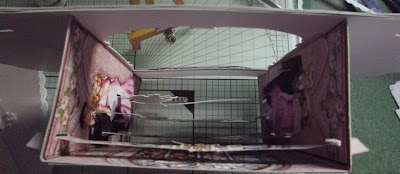
3d Room WIth A View Wedding

Hello again
This card is one I made for Beth when she was over run with card orders
I was just told a very special wedding card for a grand daughter
I know exactly what I was doing for it!
Its a kit from craftuprint and called 3d room with a view Wedding
Ive made a few of this kind of kit before and they are well worth the time and effort to make them
I started by trimming away some of the white from all the sheets then sprayed the back with Crafters Companion Stick & Stay, this was then secured to a sheet of 300gsm smooth white card
I then started the cutting out – if you struggle with cutting out I suggest you give these kits a very wide berth.
If you have plenty of time to make the card then do have a go at it, I think it took me around 3 or 4 hours to cut everything out
They are very simple to make up once you have followed the picture tutorial or better still been showed by someone.
We did this is class and the ladies loved it – they did this one over 2 weeks so that was around 6 hours.
I decorated the layers as they were cut out, so the wedding gown was glittered and all the flowers inside the card were either glittered in coloured glitter or had 2mm coloured flat back gems added
Once the doors were slotted through the middle openings and the the inner all made up – this was just a case of fold over the end pieces, push them through the corresponding slots – re-open the end pieces - job done...it was time to stick the sentiment to the back of the card
I used double sided tape so had to be careful to get it lined up correctly to avoid spoiling the card altogether
On the front I added the sentiment tag that said to grand daughter and grandson in law
All that remained was the front frame – I used 2mm pale pink flat back AB gems inside every flower and made up a cluster of gems in the posy at the top
I didn't use gems – just glitter – on the doors as I thought when they are constantly opened and closed the gems will ping off – glitter worked well enough
One more thing - the card pushes almost flat so great for posting out - it measures approx 8x8"
As you can image Beth and her customer were over the moon with this mini work of art – it really is a wedding keepsake!!
See you next time
x

Friday 26 July 2013

Dragons Realm

Hello again
This is a card for the CD Sunday Challenge Blog
The theme this week was Dreams and Dragons so I made this card
I used Jems Designs Dragons Realm as I loved the idea of the card looking like a very aged book.
So make this I printed off the book front, back and insert for dragon number 4, but I decided to make this a small card so its just A6 in size
I cut out the front and back then used my Silent Setter to make holes and also add the eyelets to the left side
I used brown and a cream fibre as I love the messy fluffy look
The insert was a problem as it was the traditional style so I folded in half, stuck inside the book and trimmed so it was the same as my book – when it was opened it had worked out quite well
I decided to add a simple stamped sentiment and the one I used fitted perfectly – stupidly – and lazily I must add – I stuck the clear stamp onto the back of a block that already had a stamp on so I inked it up then stamped where I believed was the centre – WRONG!!!
Lesson learnt – don't be lazy next time, get another block or remove the existing stamp for a few minutes!!!
There wasn't much I could do to embellish this card so I added thick pva then glitter to what was the tape holding the dragon photo
Again had I not been so lazy I should have got out all my brads as I feel sure I have a dragon shaped one as well as a hatching egg
Another lesson learnt on the perils of being lazy!!
So that's my DRAGON card
Hope you like it
Till the next card....
x

Thursday 25 July 2013

Purple With Green

Hello again
This is a card I made as a challenge but cannot remember what site it was from – I know it was a purple and green card challenge
I made the card but never did enter it – that's usually the way for me these days
But anyway I am sure you will enjoy looking at it!
Sorry but I have no idea as to whether it was a sheet, a kit or something from a cd – useless aren't I? YEP....
So I used a scalloped edged 8x8 card blank and started by trimming a piece of textured green card using the Woodware finger guard trimmer with the scallop blade, then change the cassette to Victorian I think and trimmed a sheet of purple textured card slightly smaller than the green piece.
These were stuck to the card with double sided tape.
I then trimmed a piece of purple mirri card to approx 4cm wide and the length of the card – this was cut with the fancy edge too and before securing to the card I used 2 lengths of lilac & white gingham ribbon which were laid over the mirri card to form an X shape, the ends of the ribbon were secured behind the mirri panel then the panel fixed to the card using foam tape.
I tied a small bow in the same ribbon and stuck it when the ribbons crossed.
Next was the main image, it was cut out and placed at the right hand side of the card using double sided tape.
I used green holographic peel off borders to go all around the design which gave it a lift.
The flowers were all cut out and added to the card with sticky pads
To finish I added a lilac ribbon bow and gems to the centre of the flowers as well as in the corners of the box design and top right hand corner.
A simple sentiment was cut out and matted onto a piece of purple then green textured card to keep in with the style of the card.
Not too sure what my thoughts are with this card – I like the colour scheme but the main image isn't anything at all really
What do you think?
xxx

Wednesday 24 July 2013

Wedding Day Cascade

Hello again
Thought I would share a wedding card I made as a favour for y friend Beth
She had asked for help with making one a few weeks ago so I did it for her and then had a message could the lady have another for the same couple so something totally different
I searched through endless files, folders, cds etc and then came across this kit from craftsuprint
It was designed by Sheila Rodgers and had 3 sheets to create the card.
I printed them out just as they were as they had text and graphics all over
The first thing was to trim off some of the white surrounding then I sprayed with Crafts Companion Stick and Stay, then pressed this onto a sheet of white card
The reason I trim off the excess white paper before I spray is it makes it much easier to place on the card – if its a full A4 sheet you have to be precise when laying it onto the card – my way you have room for errors!
So I did the same for the other 2 sheets and then began the cutting out
I will be honest and say I have dreadful problems when it comes to cutting scallops, circles and fancy shapes – I always have to go back time and again to catch the bits I've missed!!
Once the 3 sheets were all cut out It was easy to put together, I scored the fold lines then used photo glue to stick the front panel to the middle panel, then those two panels to the back panel
I left this for a few hours to be sure it all dried properly.
I printed a backing paper from Kanban Season cd – this cd has to be my all time favourite cd and I use it more than any other cd I own!
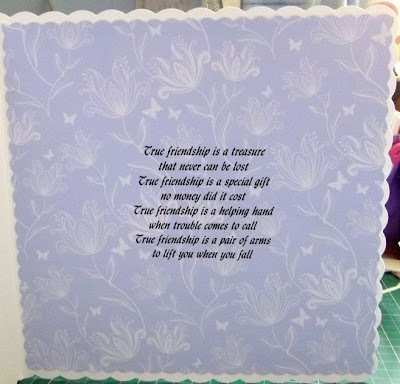
Next I put the printed backing sheet back into the printer and printed off a lovely verse – this sheet was then stuck on the reverse of the back panel.
I enjoyed decorating this card – I used a Sakura quickie glue pen to highlight all the wedding gowns then covered with glamour dust and tapped off the excess.
Tiny AB gems were added to all the brides bouquets and the printed tiaras too
For the groom I used very tiny black pearls for buttons on the shirt.
And that was it – card made!!!
I liked the end result but not near as much as other wedding cards I have made but everyone who saw this thought it was beautiful
And the lady who ordered it loved it which was all that mattered!
Would love to hear your thoughts on this one please
Bye for now
xxx

Sunday 21 July 2013

Sea of Daffodils

Evening all
My best friend Beth has spent the whole of today here with Layton and me and it was craft craft craft!!!
We have had a great day and got lots of yummy cards made up – they are all glittered and gemmed but still need our finishing touch and hopefully new trademark!!
Anyway to the card for today....
Its a kit again I'm afraid, my creativity is in hiding just now I think so I'm sticking with straight forward kits
This is a kit by Sandie Burchall – again!! Its called The Joys Of Spring
Have to say its a lovely scene and you cant help but smile at the beautiful scenery.
So I printed at full size, cut out the card front and also the insert plate as they are called
I used a sheet of A3 brown card to make my 8x8 card blank, then stuck the card front down with double sided tape.
There wasn't a lot of cutting to be done on this kit – I didn't bother with the leaves as they were too flimsy but the daffodils were carefully cut out, slightly shaped then had small sticky pads added to them and they were put in place.
I cut the butterflies out and before sticking to the card I used a Sakura Quickie Glue Pen to highlight the edges of the wings then after leaving to dry for a few minutes I used the glue pen to add glue along the body then stuck in place and opened the wings up.
I chose my sentiment then rubbed it over with a versamark ink pad, covered with clear embossing powder then repeat another two times to give a good shine
I popped a few sticky pads on the back then pressed in place with my fingertips around the edge of the circle to crack slightly which gave age to the disk too
The insert plate was printed before printing so I just trimmed it to size and using double sided tape secured it to the right hand side of the card inside.
And that's my lovely summery card all finished!
This was actually then used for a card order and we went on to make it in the Thursday class – it was well received by everyone who made it!
Ok so fingers crossed I've better organised my time so I can get back to posting daily...
See you tomorrow
xx

Saturday 20 July 2013

Blue Hydrangeas & Butterflies

Evening all
I am back by popular request!!!
Initially I was hoping to share a card a day – all went well for around 14 months then it was the operation followed by the house move and sadly the blog was neglected!
I have still been making cards almost every day but just never seem to find the 15 mins to post
So following a text to say the blog was missed – thanks Ann – here I am with the card for today
It was made using a mini kit by Sandie Burchall and bought from craftsuprint
Its called Blue Hydrangeas and Butterflies
It was so easy to make up – I printed the front sheet as it was and added a verse to the insert sheet prior to printing it.
After trimming down the main image I used a pretty Martha Stewart corner punch on the 4 corners.
I used a 2” scalloped square punch to punch out 4 gold holographic pieces and these were stuck behind the punched corners using double sided tape.
To make the large card blank I used a sheet of A3 dark blue sparkle card, it was cut down to 8x8 which was the size I needed.
I then stuck the panel with the gold scalloped corners to the card front centrally again using double sided tape.
I cut out the decoupage which was tricky in places and also had loads of butterflies which were endless and not so nice to cut out.
The decoupage was added using tiny sticky pads and when it came to the butterflies I used a quickie glue pen to highlight the wings then dipped them into the pot of iridescent glitter, tapped off the excess then used Cosmic Shimmer PVA just along the body so the wings were free to move.
As someone had asked for this card I used a Special Friend sentiment – as usual Sandie Burchall adds far too many sentiments to her sheets and kits so lots get binned.
The insert was lined up and placed inside the card – I used photo glue for this so I was sure to get it straight.
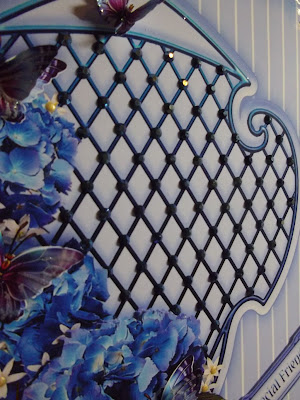
Decorating this card took me a long time – in the trellis work I decided it might be nice to use dark blue flat backed AB gems – what I didn't think of was the time it would take – best part of an hour in the end!!!
The small flowers needed something too – I tried gems but it looked far too cluttered with all the blue gems so instead I used a gold PVA by Cosmic Shimmer and the end results were stunning if I do say so myself!!!
Well all I can say is I do hope I have shared something you like seen as I have been AWOL for quite some time....
I will do my best to be back again tomorrow
Enjoy the lovely weather – I know I will!!!
x