Monday 26 August 2013

Baby Girl Book

Hi
I made this baby card for a friend last week – and I was so pleased with it as I used the grand nesties bookatrix dies so it was done from scratch
I used adorable scorable card for the back 2 sheets and then printed 2 different papers for the next 2 sheets
Because I knit the mini jumpers and mini booties I decided to add them to the card as well as a lovely baby verse
Everything was going so well – the ribbon down the centre, the gems, the decorating...even the stand cutting out was very good for a change
I then printed a sheet of patterned paper and put it back through the printer so I could add a couple of verses to it ready to fix to the back of the biggest layer of the book
I positioned the 2nd largest die over the verses and used a couple of pieces of the Hunkydory low tack tape – its the pretty purple tape – to hold the die in place...and was gutted when I removed the tape and die, used collall photo glue on the back of the paper and place on the book...then saw dirty great marks where the tape had been!!
I tried to take the sheet off but it was damaging the card so I had to try plan B – at that time I didn't have a plan B lol
Luckily I had borrowed a sheet of pink baby themed peel offs from our class building so I stuck a couple of dummies, bottles and booties onto scraps of the paper and cut them out – these worked a treat – work all saved!!
As it was a big card I made up a box-a-lope, time ran away with me so it was left as a plain white whereas it would have looked so much nicer decorated – I need not have worried though because it was well received – in fact the lady cried at how special it had turned out!
x

Friday 23 August 2013

Can You Build It?

Hooray I'm on a roll...3 posts in 3 days!!!!
I'm sharing a card I was asked to make for someone...I always ask the same questions when asked to make a card – who and what is it for, what are they into, approx age group and when do you need it!
I got the answers – birthday, hubby, old enough and he is a builder who has a can of Carling every night
Well I have to be honest and say I was stuck so as usual I called on my crafty friends for ideas
And its a huge thank you to Lou for suggesting this sheet by Lee Jacobs, its part of his doodles collection and is on sale through craftsuprint
I used PSP9 to create the brick backing paper and here it is for anyone who can use it

For the card I used a dark brown sheet of card, folded into A5 card blank then covered it with the brick paper leaving a narrow border all around the front.
I cut the main image which had the mini wall and stuck it on the right hand side of the card, cut the decoupage elements out and built them up with small sticky pads
On the sheet was a small brick wall so I trimmed it and added next to the main image using large sticky pads
So that was my basic builder done
Next I added a few Carling beer cans to the wall, some stood up and a couple laid on a side.
I also stood one on the wall he was building as well as crushing a can and dropping it to the floor
To finish I added glossy accents to the cans (for some reason it gave them a blue tinge) and also to the trowel.
A shaped sentiment went on the top and after taking the photo I added ****** was 'ere 2013 using peel off letters which she was really pleased with as she said he would be dead chuffed to have his name on the card!!!
Hope you like the idea!
See you next time
x

Thursday 22 August 2013

Call The Fire Brigade

Hi there
Yes I know – I've been naughty for not posting for around a week but I just never seem to find the time.
Last week I wasn't in a good place – things happened and before I knew it I was at rock bottom
But I am pleased to say it was short lived – and I am well on the way to being normal – well as normal as I can ever hope to be lol
I have so many beautiful cards to share with you all – I think there must be around 25 so far so plenty to be going on with.
Ive decided to use this card today as I want to enter it into the CD Sunday Challenge Blog
The theme this week is ADD A NUMBER
So to make my card I used a sheet by Janet Briggs – it was bought from Craftsuprint – I couldn't resist this cheeky chappie!!
And I used HOTP Vintage Christmas CD ROM for the brown backing paper which looks quite plain in the pictures but has a very light pattern to it which is what I wanted rather than something fancy to take your eye away from the main image!
So to make the card I used an 8x8 white card blank, printed out the brown paper and trimmed this so it could be glued to the card front at an angle...I decided it was about time I started using a different way to mat and layer as I always fall into the safety net with keeping it all straight!
Next I trimmed a piece of textured orange card – this would have been a good mat on the brown so worked well being twisted – again moving out of my comfort zone
Once the sheet was cut up I added big sticky pads to the back of the base image and this was then positioned centrally on the layers – this time it was set square...ah the comfort is good lol...
The decoupage elements were easy to cut out and they were added using small sticky pads – I shaped the up most layers.
When it came to decorating the card I used some of the lovely sheets of peel off gems...I found them in Boyes for anyone who has one of these stores and at just 79p a sheet great value for money, I think I bought 8 different colours and the dots in the sheet are in several sizes and there are loads and loads so do look out for them
Anyway I added clear with a silver edge to the water bubbles, the red with gold edge were placed in the four corners of the base image and the printed brown sheet
On the orange and the patterned red sheet I used champagne with gold edge
The helmet has a number 7 – naturally its backwards way on – the way young children write it, I added tiny gold dots to the plaque with the number on the helmet and the same were used on the Happy Birthday.
To finish off I added glossy accents to the water leaving the end of the hose and the plaque on the helmet
And that completes this lovely fun card which I think is perfect for a child of any age!!!
I will hopefully see you again tomorrow – I have to start getting things ready for my Craft Retreat a week on Friday – oh how I love this long weekend break!!!
xx

Wednesday 21 August 2013

A treat - for free!!!

Hi
 
I'm sure many of you will have heard of GRAZE - some of you may even have tried them before
 
In case you don't know, GRAZE do small food boxes - you can chose which 4 items you want in your box
 
You chose the day for delivery too - and then its just a case of watch the post on the date - your box fits through the letter box so no problems if you aren't at home.
 
GRAZE do boxes for special dietary needs too...how good is that!!!
 
I have had loads and love them...especially the chocolate treats.
 
After all the treats have gone I use the box - they make fantastic altered art gifts - if you follow me you may well have seen 3 or 4 I have previously made.
 
If you would like to have a try of a GRAZE box for FREE then simply click this link and sign up online
 
 
Once you have had the free box there is NO obligation to buy more
 
And for every person who signs up using my link, I get £1 off my future boxes - so we all gain!!!
 
This is very safe - I started with a free box through a link like this and have had around a dozen boxes now
 
Thanks

Wednesday 14 August 2013

Lots more cards

Hi

Its been a while since I last blogged - sorry

Where does time go?

I've been busy making cards for orders, for friends, for class

And these are the latest to go to Macela Designs

Hope you like them!!

x


Sunday 11 August 2013

Quick & Cute

Good morning
This card was made a short while ago as a surprise card for friends Beth & Mike who own 3 beautiful big Labs
Its from the Kraftyhands Cute Puppies cd ROM that was launched a couple of months ago and all I can say is if you haven't seen this before just go ahead and get it – its super cute and the bows are fab when made up!!!
I used a dark green A4 card that was folded on line 7 of the Eazi Score Board then turned and scored again on line 7 making the square card needed.
I printed the sheets needed and cut them out – have to say this is such a quick and easy card as it has the backing paper and 3 squares to form the pyramage, then the bow.
Before sticking the backing paper to the card blank I nipped the corners with what I now know is called a Lip shaped punch.
Then it was the squares which I used large sticky pads and because its pyramage and sometimes it runs off pattern slightly I used my Pit Stick on the pads so I could move it if need be.
To make the bow is so simple – there is a great tutorial on the cd for them – but its the long piece at the bottom white side up, then the smaller piece – a hole is pricked the each end of both pieces and in the centre, then push the brad through the centre (so its sat on the patterned piece) then fold the long left and long right edges onto the legs of the brad followed by the short edges and fasten off the brad
All that's left then is to plump the bows up a little if they had flattened in making them
I stuck the bow to the bottom right corner of the card and added the bone shaped sentiment to the left side
Now tell me – isn't this just the cutest – and quickest card?
Be back again soon
x

Sunday 4 August 2013

Transport For Nephew

Good morning all
I was asked to make a card for nephew so had a free run – as it was needed for this afternoon I made it last night
Imagine my surprise when I checked out this weeks theme on The Cd Sunday Callenge Blog and found it was Transportation!!!
I used Debbi Moore Cards For Men .
To make the card I used an 8x8 card blank. I needed some red mirri card but I'm afraid its in a safe place with all but gold and silver mirri card – and yes you know what I'm going to say – I cant find my safe place!!!
So instead I used some vellum type paper, its bright red one side and sort of pearlescent and the other, so I used the pearlescent side up, the paper was trimmed so it left an all round border, then I nipped the corners with a punch and stuck to the card with double sided tape.
Next I trimmed a sheet of map paper with red heavy lines from the cd, again I left a border all round and nipped the corners then stuck with double sided tape.
I cut the base image out and matted it to a piece of dark brown card, the corners were nipped on the card.
Using a sheet of the same red vellum paper I folded in half so again I had the pearlescent side showing, I trimmed this so I had a broad all round border, nipped the edges then stuck the brown card to it with double sided tape and finally this entire panel was stuck to my card using large pads, it was up in the left corner.
The decoupage was cut out and fixed in place using small sticky pads.
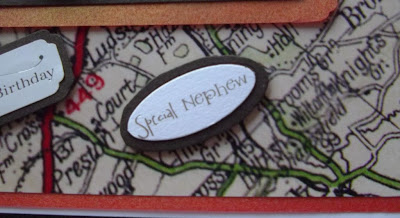
To finish off I used Happy Birthday and Special Nephew sentiments from a pack by Papermania, these were both stuck to oddments of brown card and cut out to leave borders then stuck at an angle under the image with sticky pads.
Using Cosmic Shimmer clear varnish lacquer I touched the wheel trims and lights.
Finally using some very tiny white peel off letters I added NEP35 to the registration plate as it was for Nephews 35th birthday
And that's the card all finished, insert added, in cello bag ready to be collected!!
I do hope you like this card
See you again soon
xx

Saturday 3 August 2013

All Good News!!!

Hi
Last week was filled with happiness for several of my friends
To start with my best friend Beth & hubby Mike had some news they had been waiting for for quite some time – it came on Wednesday so now they can sleep easy
Then my friend Ann sent me a text to say her daughter Ruth had passed her LPC and had a distinction – I am pretty sure Ann & hubby Adam as well as Ruth did some celebrating and rightly so..congratulations Ruth..
I was looking through the Cd Sunday Challenge blog yesterday thinking it was Sunday and found I had 1st place with the Dragons Realm card I had made and submitted – whooo I was well pleased with that result!!!
And finally my lovely friend and class member Suzanne became a grandma on Wednesday for the 1st time. Baby Zachary was born
1 am our time but as he was born in Australia it was 8 their time and weighed a healthy 8lb 7oz – mummy and baby are doing well!
You may recall sometime ago I told you that Suzanne's son had won a new sports car, a round the world trip and some money – then I shared the photos of when Lee and Jadie got married and they are now proud and happy parents
Its sad that Suzanne and hubby Dave won't get to hold baby Zac but at least they will see baby every week through Skype when Suzanne chats with Lee and Jadie
And so that is the news all shared so onto the my card for the day
I made this for Suzanne and Dave – I have no idea who its by or when it came from, I was browsing my Picasa when I spotted the kit and it was perfect.
I added text to the blank tag which was supposed to slip under the pre filled text tag but I needed my own text
The pages were trimmed down then sprayed with Stick & Stay and secured to a sheet of marble patterned card then cut out
Once I had the 3 pages done I added a length of baby ribbon to the centre of the card – I was so annoyed it wasn't straight but it just would not lift back up..
I lightly shaped the pages so they looked more book like.
The stand was stuck to some dark blue thick card and cut out
Back to the pages, I cut out the pieces to build the pyramid and used small pads to give a little height
The tags had a hole punched then a small piece of spotty ribbon slotted through, these were added with pads to the right hand side
I printed a verse then trimmed it down with deckle edge trimmer, coloured the edges with a light blue distress ink pad then stuck it to the centre back.
I used a Sakura quickie glue pen to edge the bears the covered with glamour dust to finish
I posted the card to Suzanne and also one for her daughter Vicky who is home in Hull for another few weeks before going back to Australia – I will be sharing her card soon too!
Ok...I'm ready for my bed now – I'm shattered so will say good night for now and see you next time
x

Thursday 1 August 2013

Loads of cards

Hello again
I am so sorry that again I haven't been sharing the cards
I have lots made but just struggling to find enough time in a day to do all I have to do
So today I thought I would show you the cards my best friend Beth & I have made over the past week or so...
These are mainly sheets and kits bought from craftsuprint, card making downloads and scrap booking mad but we have added our finishing touches which have now made them into WOW cards!
I would really love your comments on the cards – do you have a favourite – if so why? What makes that card stand out enough for you to call it your favourite?
I will be back soon – promise – even if its when I get the text from my friend Ann saying simply Bloggy Blog Blog!!!!
x