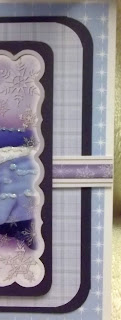
Hiya
As I said
yesterday I would share the photo of the other cards I made for the
2nd sheet I printed out.
The printed
sheet was taken from a Crafters Companion CD Rom called Beatrix
Potter Everyday & Winter
I have used
3 different backing papers that were actually taken from a Kanban CD
Rom called Kanban Stamped Backgrounds – why it has such a title I
don't know as it is the most beautiful backing papers - now I have
seen it I know it will get a whole lot of use as the papers come in
lots of colour ways and styles so ideal for all occasions.
So
materials for this card I used ….
Heat mat to
work on and protect your surface – I always use it...
White A4
card stock
Printed
sheet
3 different
A4 backing papers
Dark blue
A4 card stock
PVA glue –
I use Cosmic Shimmer
Glamour dust
Corner
Chomper – any corner rounder will do.
Double sided
tape
Sticky pads
Eazi Score
Board & tool
Tonic 8”
guillotine
Scissors
Tweezers
Shaping tool
from www.dimensionstamps.com
Foam shaping
mat – stamping mat or even a mouse mat
To
make the card ...
I used the
Eazi score board and tool to score line 7 onto the white card to
create the card blank – I have used landscape (often called tent
fold)
I trimmed
one of the backing papers down to fit the card front leaving a chunky
all round border – then rounded the corners using a corner chomper.
This was then stuck to the card with double sided tape.
The dark
blue card was next to be cut down – this was to fit on top of the
backing paper – a border all round then rounded the corners and
stuck in place with double sided tape.
Using the
2nd backing paper I cut a piece to fit on the dark blue I
cut it so I had wider borders at the sides but narrower top and
bottom – corners were rounded and then this layer stuck in place
with double sided tape.
From the
printed design sheet I cut the paper ribbon and using a wider double
sided tape I attached this across the centre of the card – it was a
perfect fit from left to right edge.
I cut the
largest topper from the sheet – taking care not to damage the
remaining 2 toppers -then matted it to a piece of dark blue card
leaving a border, because of the shape of the topper its width of
border differs.
I positioned
this panel in the centre of the card – I then stuck the panel with
large sticky pads.
Finally it
was down to the sentiment which I trimmed, layered onto a piece of
dark blue card leaving a narrow border then fixed across the top left
corner using a large sticky pad.
I had 1
sheet of backing paper left so folded in half and stuck inside the
card as an insert – because I also printed a general insert I
cropped this one down a bit then punched 2 corners using a Martha
Stewart Snowflake corner punch.
Lastly its
the decorating – I used Cosmic Shimmer PVA glue on the top of walls
and bricks here and there on the bridge then covered with glamour
dust and left it to dry.
Using the
quickie glue pen I highlighted the snowy ground then covered with
glamour dust – once the PVA had tried I shook away all the excess
glitter to reveal a lovely card.
I do hope
you like the card – and more so that what is left has been used to
create the card for tomorrow – at least after that you can have a
break from Beatrix Potter...
Hope to see
you then....
x


Beautiful card, Angie. Love the colours. x
ReplyDelete