Hello
I have the
last of the Beatrix Potter cards I have made to share today.
This is a
very special card and was made for a very special lady – my
beautiful friend Jae who had a birthday on Sunday and deserved to
receive something special – she has said how much she loved it so I
feel it ok to share with my followers now
I used the
Appley Dapply cd from the Beatrix Potter 10 cd collection – have to
be honest and say I didn't even look through this collection when I
first got it but after using sheets from one of the newer cds I just
had to have a good look around this set...so many fab images to use.


So
materials for this card I used ….
Heat mat to
work on and protect your surface – I always use it...
A3 white
card stock
A4 white
card stock
A4 aqua card
stock
Printed
decoupage sheet
Printer
sentiment sheet
A few
backing papers
A4 & A5
pieces of silver mirri card
PVA glue –
I use Cosmic Shimmer
Corner
Chomper – any corner rounder will do.
A border
punch that will go through thick card
Lots of
assorted WHITE paper flowers
Adirondack
POOL ink pad
Application
tool for ink pads
Assorted hat
pins
Aqua
coloured ribbon
Clear AB
gems
Butterflies
were die-cut in white
Brown and
aqua card candy
Double sided
tape
Sticky pads
Eazi Score
Board & tool
Tonic 8”
guillotine
Scissors
Tweezers
Shaping tool
from www.dimensionstamps.com
Foam shaping
mat – stamping mat or even a mouse mat
To
make the card ...
I used the
eazi score board and A4 card – it was scored and folded on line 4 –
A4 gatefold then spun around and scored the same at the other side –
that made my gatefold card
I cut the A3
card in half long ways – then using one piece I folded it in half
the the top piece in half again to create the easel.
Working
first on the gatefold card I cut a piece of backing paper to fit
inside the card and stuck in place with double sided tape
Then I cut 2
panels the same size from mirri card to fit on the gatefold doors –
followed by 2 pieces of backing paper slightly smaller to fit inside
the mirri card.
The base
image was cut from the sheet and matted onto silver mirri card making
sure I left an equal all round border – the panel was then attached
over the 2 doors with double sided tape.
Decoupage
was cut out and added to the image using small sticky pads and
shaping the top most layers.
The whole
card was then stuck to the folded front layer of the easel card – I
used double sided tape and PVA to ensure it stuck well.
On the base
of the easel I cut out and stuck silver mirri board so it almost
covered the whole base then covered it with the same backing paper as
the doors again leaving a narrow border.
I used
another piece of silver mirri card to act as the stopper – it was
placed on large sticky pads and positioned in place as the stopper.
Next I used
a length of aqua coloured card and punched a border along both long
sides and added large pads to the back before sticking centrally on
to the silver mirri card
I cut out
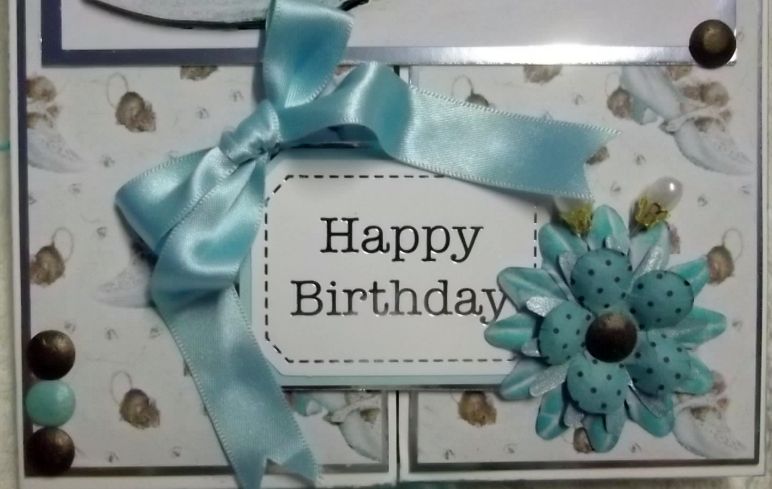
the sentiment panel with matched the main image – it had printed
text along the bottom that wasn't appropriate for what I wanted so
used a large Happy Birthday tag I already had to cover the sentiment.
I picked out
all the flowers I would like to use – put them into position on the
card and once happy I took them off one by one and coloured using the
pool ink pad and ink applicator tool...
The
butterflies were also coloured in the same way...
Before I
stuck the flowers on the card I quickly sprayed then all with Perfect
Pearls Mists in Pearl...blasted them with the heat gun to dry off
then added to the card using Cosmic Shimmer PVA glue to hold in place
firmly....
Some of the
flowers I left white and just sprayed pearl and some I coloured pool
then used a brown pro marker to add spots.
The paper
flowers in the top right corner of the gatefold card were already
printed and coloured but they looked pretty with the rest.
The hanging
flowers to the left of the gatefold were pure white so I sprayed with
Aqua Lagoon Cosmic Shimmer Mist lightly then dried with the heat gun
before draping so the colour wasn't transferred.
A pretty bow
was tied and added below the topper and the butterflies were attached
to the base card as were the hat pins.
To finish I
added lots of clear AB gems to the shoe design and the bodies of both
butterflies
Card candy
was put in the centre of some flowers, corners of the topper and one
corner of the gatefold card
I added a
very personal verse to the base of the card
I am sure
you will all agree it really is a special card – it took me a whole
day to make!!!
Another fab
card for you next time.
Hope to see
you then....
x
Beautiful card, Angie. Anyone would be delighted to receive it. xx
ReplyDelete