Evening
I have made
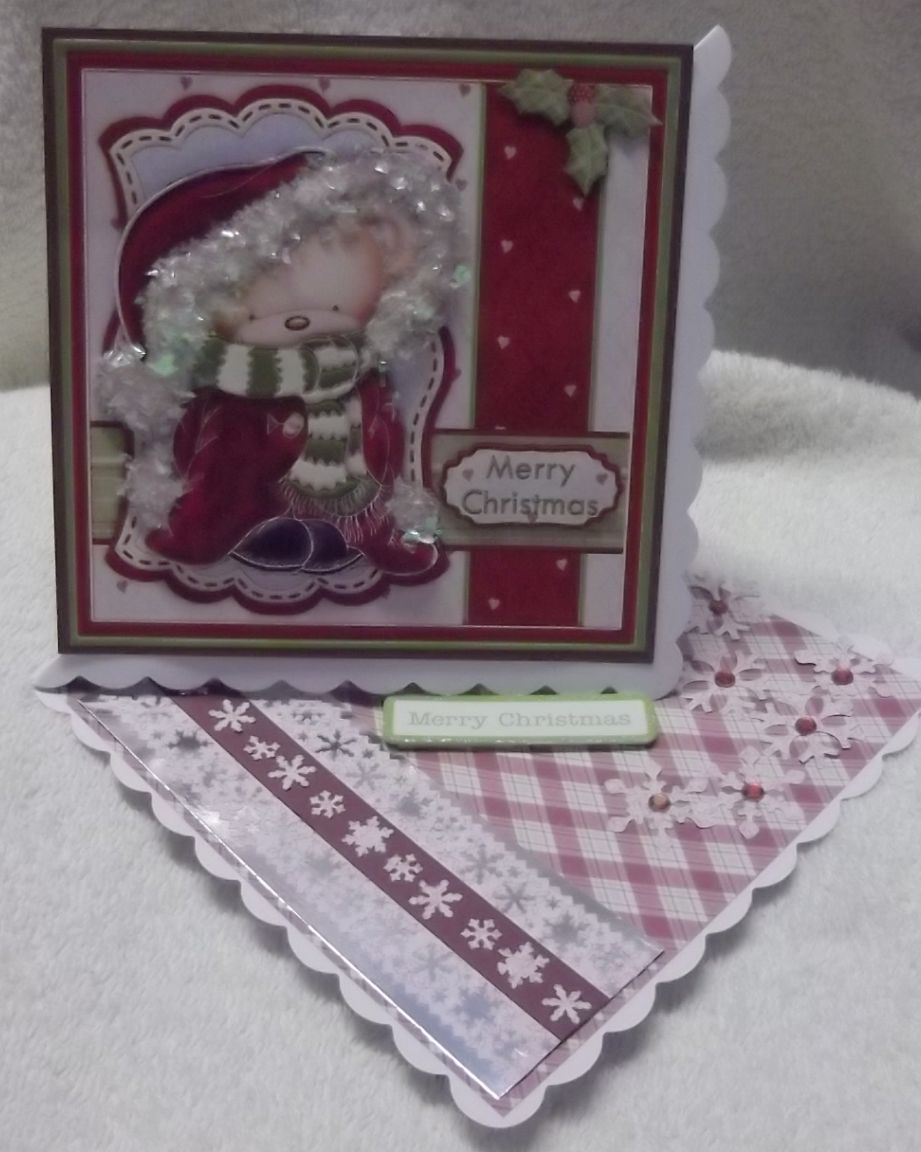
this image up many times and I think I may have shared it 2 or 3
times too – always doing something different with it – the sheet
is by Janet Briggs and was bought from www.craftsuprint.com
Well here it
is again – something different – as in a twisted easel – a
first for me!
I really
enjoyed making it up too so maybe I will end up making lots of my
favourite images up as twisted easels!


So
materials for this card I used ….
Heat mat to
work on and protect your surface – I always use it...
6x6 scallop
edge card blank
A5 burgundy
card stock
Decoupage
sheet
Silver mirri
card
2 a5 sheets
of backing paper
chipboard
sentiment
snowflake
border and corner punch
shaved ice
mica fragments
snowflake
punch
red AB gems
Cosmic
Shimmer PVA glue
Double sided
tape
Sticky pads
Eazi Score
Board & tool
Tonic 8”
guillotine
Scissors
Tweezers
Shaping tool
from www.dimensionstamps.com
Foam shaping
mat – stamping mat or even a mouse mat
To
make the card ...
I folded the
scallop card along its pre-scored crease then using the eazi score
board I scored a line from bottom left corner through to top right
corner of the card front – folded it and this created the twisted
easel base.
I cut out
the main image and also the few pieces of decoupage then made them up
using small double sided sticky pads
The image
was then matted onto a piece if the burgundy card then attached with
double sided sticky tape to the card front
I trimmed
one of the backing papers to fit the base of the easel leaving the
all around border
A piece of
silver mirri card was cut to fit across the card then a piece of the
2nd backing paper was trimmed to fit inside it – then
had the long edges punched out using the Martha Stewart snowflake
border punch
The punched
panel was stuck to the silver mirri panel and then a narrow strip of
burgundy card was stuck across the centre
I then used
a dot of pva on the back of some of the snowflakes that had been
punched out the borders and stuck them onto the burgundy strip
randomly.
A glittered
chipboard sentiment was attached to the card with sticky pads to act
as a stopper so was positioned where I wanted the main image to stop.
Finally I
punched out a few larger snowflakes using some punches and the 2nd
backing paper – I stuck them in the corner of the base card then
added red AB gems to the centres.
To decorate
I covered all the fur on the hat scarf and cuffs with pva glue then
covered with the lovely shaved ice mica fragments – and they look
amazing!!!
As I said
this is my first attempt at the twisted easel but wont be the last.
I'm so
pleased it worked in practice as I had it in my head – ideas don't
always work – thankfully this one did!!!!
Until the
next card then....
x
I love this beautiful cute card, Angie. xx
ReplyDelete