Hi
I
have a card to share that I really enjoyed making
To
start the story
I
bought some stamps from www.alysinkyfingers.co.uk
some time ago and had an email to say she was setting up a monthly
project club
So
I thought about it – and in the end decided to go for it
Its
£7 a month and £1 postage so just £8 a month – its taken over 12
months so as your kit is sent off to you the money comes from your
account
The
kit contains all the stamps, card and items needed to make the card
shown – you get a couple of sheets of A4 paper with colour pictures
of the card you make with the step by step instructions.
The
1st month I received the stamps and paperwork to make the
card and also a large set of useful stamps as a welcome to the
club...the other big benefit is a whopping 20% of any purchases
online or at shows...so well worth joining!!
This
morning my kit arrived and I was itching to get started but had so
little free time – so I gathered all the list of ingredients and
decided I would do it at class – and I did!
The
list of materials seemed garish as it was
Tim
Holtz Distress Ink in Worn Lipstick & Mustard Seed – thats red
and yellow
But
they really worked well together
To
start with Aly said to use the spare piece of white card in the kit
and use an applicator tool and Worn Lipstick ink use circular motions
around the edges of the card – then do the same inside using
Mustard Seed
When
both were done add more Worn Lipstick to the centre if I felt I
needed it.
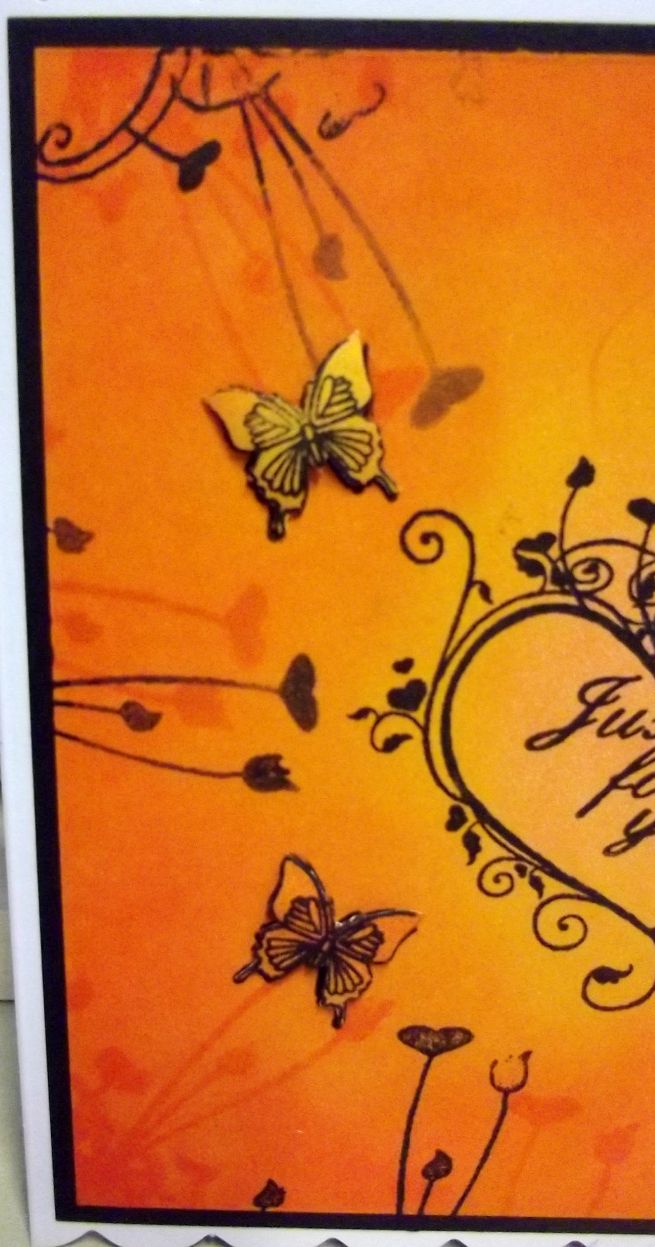
The
the flower heads and butterflies are stamped onto that coloured card
and cut out
Next
it was colour the larger piece of white card in much the same way
Then
I stamped the heart in the centre and then stamped it on a post it
note and cut out as best I could
The
post it note mask was placed over the base heart and then flowers are
stamped down the edge and slightly overlap the heart
After
that the mask was removed and I added a couple of butterflies
Finally
the Worn Lipstick ink was used to stamp the large flourish randomly
around the edges inking up after 3 or 4 impressions
Then
the same thing again this time using the black ink and stamping
slightly off the red ones.
The
Just For You was stamped in the centre of the heart
The
flowers and butterflies I had stamped and cut out of the 1st
piece of card I coloured were shaped using the shaping tool and foam
mat and then added on top of the stamped ones using double sided
sticky pads
Now
its just matting the coloured panel onto the piece of black card and
that then stuck direct to the 6x6 scalloped edge card
The
photographs of my finished card show as I finished it at class but
I have since coming home added glossy accents to the heart and a
touch of glamour dust to add the wow sparkle
Off
to play with the stamps and see what else I can come up with!!
I
love this months card and stamps – cant wait for the start of next
month for the next kit!!!


See
you all again tomorrow
x
Another lovely card Angie
ReplyDeleteWell done
I have lost all interest in stamping which is a shame as there are some lovely stamps out there, and cards to be made......Irene.
Angie I like this card and the idea of a project club. Are you committed to taking part every month/ Will she send to Cyprus ? mmmmmmmm best go and look. Thanks for sharing xx Wynn xx
ReplyDeletePretty card, Angie. Love the colour scheme. You are a very good stamper. xx
ReplyDelete