Good evening to you all
I hope the weather has been as nice for you as it has been for us here in East Yorkshire... I'm pretty sure I could have had my chair out in the garden today and caught the sun but as I had my daughter and grandson round it wasn't practical as the birds were in the garden and they don't appreciate a young lad zooming around on toys!!!
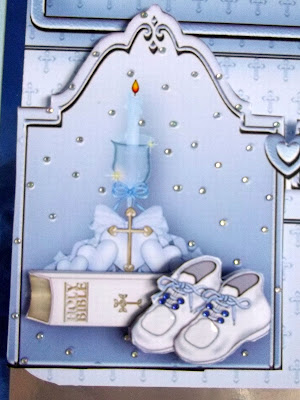
Today I have to share a last minute card I made – on Wednesday we popped into the post office so the post lady could finally meet the new owl and she asked if I could possibly make her a special Christening card – of course I said yes and then found she would need it on or before Friday!!!!!!!
As I had already agreed to make it for her I couldn't then say no! I had no idea's as to what I would be doing until I sat at the PC and searched through my kits to start with...
Out jumped a lovely kit by Sandie Burchell – bought from http://www.craftsuprint.com/ quite some time ago, I knew one day it would be needed...
Its actually a Top Slot Kit but I don't like them at all so I did a version that my friend Jae once did and I loved!!!
I printed the sheets onto matt 128gsm photo paper then cut them out and put to one side for now.
I used 2 sheets of A4 baby blue card stock, scored one piece at about 2cm down the card and folded it, then stuck the other piece inside it and cut off the excess to create my card blank.
Next I used a sheet of dark blue holographic mirri card, measured it on the card blank and cut the excess off...then used a lovely EK SUCCESS punch to create a round scallop border across the top and the bottom of the card – this was fixed to the card blank leaving a border.
Then a sheet of silver mirri was measured and cut down – a different EK SUCCESS border punch was used to do a top and bottom border – this was then glued to the blue mirri, leaving a border all round.
The main sheet of printing was cut down – when you print it out there are 3 panels to it which fold to form the top slot – so I cut away the panel that would hold the sentiments and used the other 2.
I used sticky pads to raise the On Your Christening Day panel which went onto the top section.
Then I cut away the stems on the tags and used just the tops – these were attached again with sticky pads and to the bottom of the panel.
There wasn't a great deal of decoupage to add but what I did have was put in place with sticky pads...
To embellish I may have gone OTT but it was crying out for glitz I thought....so I used very very tiny gems – I believe they were 1mm – which I added to the background of the 3 tags – it was actually printed with tiny white dots so I put a gem on each dot!
For the top panel I used some beautiful aqua coloured AB chessboard gems...what a shine these gems give off!
To finish it was a small blue stitched edge bow and a touch of glossy accents
A lovely sentimental verse was added to the insert and a as the kit offered a matching gift tag I stuck it to the back of the card!!
Only downside was these cards are too big for envelopes so I had to make one – which isn't a problem using the fab Crafters Companion Enveloplus and a 16x16 sheet of card.
The lady was over the moon with this card – but then so was I!!! And as I uploaded it to my facebook I had lots of lovely comments on it there too!!
I do hope you enjoyed this card – and if you have any of the top slot kits why not try make them this way for a change? I'm sure you wont go back to how they should be made...
See you again tomorrow?
Hope so...
x


No comments:
Post a Comment