Hi
again
Have
I got a treat for you!!
I
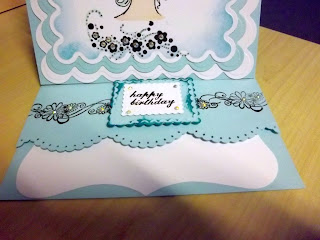
have made up this weeks class project but liked it so much I did it
again in a different colour – then a 3rd in another
colour!!
And
what's more – these are going in my spares box – BUT – I will
offer one as a free gift...you know what to do – get a message to
me somehow – either on the blog – by email – text – or phone
– tell me why you like the card and most important which colour you
would like.
And
added to that – I will make up some kits with everything you need
(apart from colouring pens) and sell them to raise money for our
building and my favoured charity – so if you would like a kit let
me know which colour
So
to the cards...
I
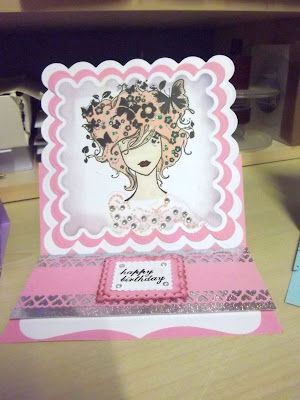
have used a wonderful stamp from a set called Butterfly Beauties and
I had it from The Stamp Man – it has the image I used plus a small
version – ideal for ATCs – and an ornate butterfly again with a
smaller version...a few sentiments, flowers and small backgrounds
When
I first saw the stamp I wasn't sure about it but when I saw something
done with it I just had to have the stamps – tracked them down and
must have had them 18 months and its the 1st time I have
used them!!!
So
I made a standard easel – slightly bigger than when I use the blue
board – that's because I used nestability scallop squares in 3
sizes
I
stamped the image onto white card then cut it out – left the die in
place and inked the edges with Tim Holtz distress ink pads
The
next layer I cut was the colour of the base card and then a further
white panel.
On
the easel base I used a bought shaped card – when I saw the cards I
loved them but soon found they were useless if I wanted to add an
insert – so this time I cut the card into 2 pieces and used a piece
per card.
Usi8g
the left over coloured card from the die cutting I measured a strip
and used a border punch along the long edges – used thick sticky
pads and placed to act as the stopper
I
used a small square scallop to cut a purple layer and size smaller to
cut white – these were used for the sentiment.
The
image was stamped using black ink and on the lilac and pink a
matching ink for the below the neck design
The
face was coloured using Blush promarker and the hair using a pro
marker to match the card colour
Once
that was all done and put together I added glitter around the hair
and neck and small AB gems and pearls in between
I
do hope you like the cards and will leave a message for me!
Back
tomorrow
x


oh i'v lost my comment anyway I love it it is a fab card when i saw the first one i thought yes then the second one was lovely and i thought I would love to do it in lilac and there it was , beautiful thanks for showing us angie Pat xxx
ReplyDeleteSooooo pretty. Love the butterflies in her hair and the flourish of flowers under her neck. Well you know what I'm going to say......it's got to be Pink for a Pink Lady lol but I do like the first one also xx Wynn xx
ReplyDeleteVery pretty card, Angie. I love the lilac version (I love all of them, but I really like lilac). Love the shape of the nestabilities and they go so well with the stamp. Anyone receiving this card would be delighted. Excellent. Thanks for sharing. xxx
ReplyDelete