Wednesday, 18 February 2015

Gone Fishing


Hello

Not had any crafting time today so just as well I had a few made up from yesterday!

Today’s card was a sheet from Craftsuprint but I cannot recall who the designer was – and I don’t know where it actually is on my PC as I just did a search for fishing in Picasa


The card is very simple but the lady who ordered it was very pleased with it

I started by cutting out the base image and it was matted onto aqua coloured card, then onto brown kraft card and finally on to my dark brown A5 card blank

The decoupage was easy to cut out and to add interest I used fine silver metallic thread and a needle then stitched in the eyes of the rod and caught the fish...

The decoupage was all stuck in place using sticky pads as was the Happy Birthday.

One thing to mention, I added the dad at the top of the image through Picasa and thought it quite apt that it had fish bone for the letters

And that was it!
I’m sorry this is so short but the PC is playing up so hubby is waiting for me to finish then he can do his magic on it for me!!

See you again tomorrow – I have had some new dies arrive that I ordered a few weeks ago and forgot about so I am hoping to get to play with them...

Take care
Hugs
Angie
x

Tuesday, 17 February 2015

Love Tag


Hi

Can’t believe how late I am tonight – just don’t know what happened to today

I managed to get a couple of card orders made but don’t feel happy with them but they have to go tomorrow so it’s them or nowt.

And I have battled to create a tag for a swap in a new group I joined, the theme was simply LOVE and the tag could be any shape and size but no bigger than A5

I have all manner of ideas running about in my head but when it came to creating I was lost..I have made and scrapped 3 but decided this one was going to be the one...

So I cut my mount board to 5x7 inches and rounded the 2 top corners using the corner chomper. I came across a stamp that was ideal for the background so stamped using sepia Versafine ink and embossed using cocoa embossing powder, then I was stuck.

I decided I would try something totally different for me, so measured and marked the tag then punched 6 holes added brown eyelets and set them in place! I found a fancy edge heart which I stamped a rose text in the centre and coloured with the sepia ink and also coloured the edges of the tag.


A length of brown spotty ribbon was threaded and criss crossed through the eyelets then tied into a bow. I slipped a Love charm onto the ribbon before tying the bow and that finished that side of the tag.

I put a piece of cream card in the tied together embossing folder and fed it through the Big Shot, stuck it to my tag with double sided tape then rubbed across the embossed area with a distress in then used a deeper colour on the edges, self adhesive glitter dots in purple were stuck on the cross over’s of the pattern.

When I had a spend online a week or so ago I bought a lovely sheet that had hearts and roses so printed it so all 4 pages were on just one page, cut it all out and made up the decoupage using sticky pads. Because the design was a back to back I cut the back out and trimmed it to a heart shape then used pva to stick this is the centre of my pink/purple side, next I used double sided tape along the bottom of my decoupage section and a little at the sides then stuck it over the layer I had glued which created a lovely pocket

I had a tiny gift card on the sheet so wrote a note inside, used some purple ribbon and attached it to the gift card and popped in the pocket

And that was my Tag completed and I do quite like it now – just hope my partner will when she eventually gets it as she is in Australia.

Ok friends that’s it for tonight
See you again tomorrow
Hugs
Angie
x

Monday, 16 February 2015

Box Of Hearts


Hi

Today it’s not a 
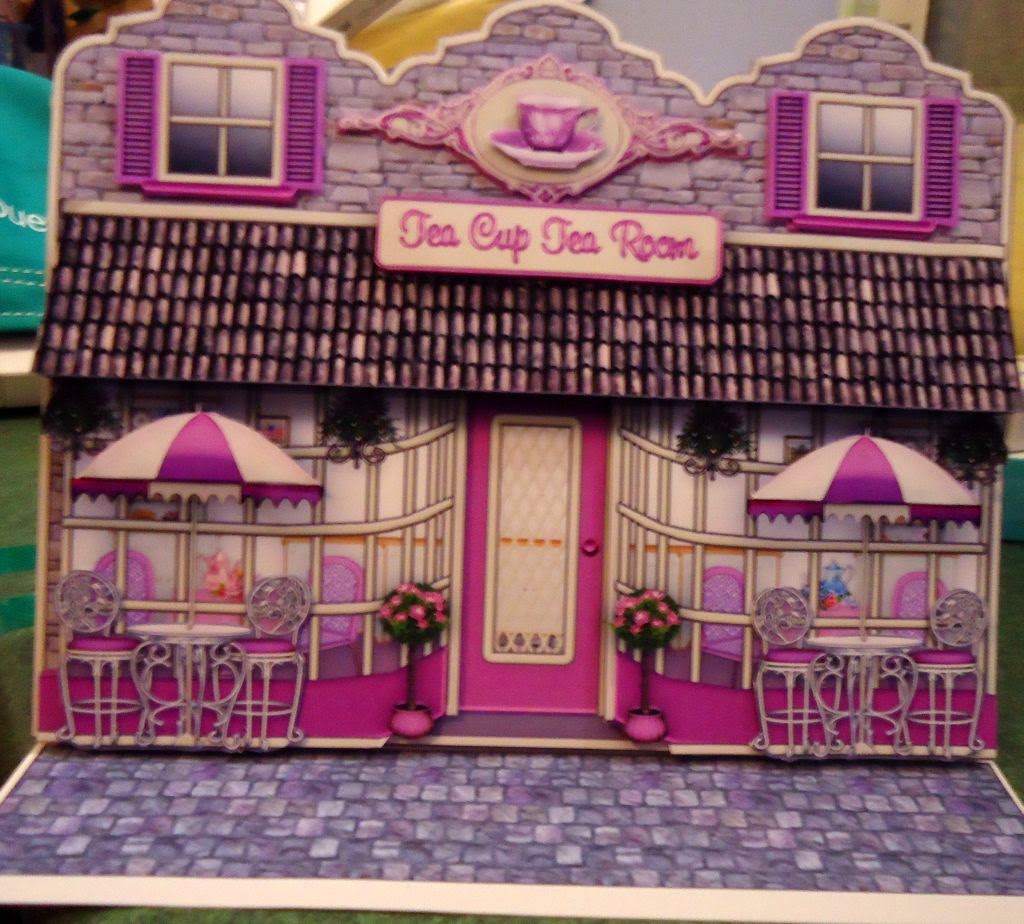
card but a pop up box, last year they were so popular but seem to have disappeared now...it’s been that long since I made one I had to ask a friend for measurements!


I was asked to make something loving by a friend, it was for her son to give to his girlfriend and asked it be hearts and hearts...so thinking cap on and quickly I decided on the pop up box as there is so much room to play with.

And I am going to enter this into the CD Sunday Challenge Blog where the theme is still Floral Frenzy - my creation are like heart flowers, if its accepted on the blog great if not never mind

To start with I used a very pale pink card and scored it according the measurements I was sent – I can’t remember what score lines I used but if you really need to know message me!

I had printed just 2 of the beautiful backing papers from Polka Doodles Work & Play 9, Love & Kisses, and used one of the papers to line the inside of the box and then used Love and Kisses X  paper to cover the outer sections of the box.

Last time I did a pop up box I had just 2 inner tabs to use for decoration but this time I used 3 as I had an idea of what was going on each tab.

I started off colouring 5 small but thick mdf hearts with a red promarker, then I triple embossed them for a high shine, they needed a couple of hours to completely set before I could use them. Next I painted a larger but thinner mdf heart with black board paint and left that a few hours to dry too.


Also on the Polka Doodles cd were sentiment pickets and scrabble pieces so I printed a sheet of each, with the scrabble tiles I cut out the girls name Megan, I chose 3 different shades of colour, cut then out and set to one side as they were to be stuck to the small glossy hearts.


I came across a thin wooden Love sign so coloured it with red promarker and glued it to front flap using Pinflair gel. A small heart shape was also stuck to that panel, I added tiny clear ab gems to give it a wow. For the left flap I coloured a wooden heart and matching key, I used 3 jump rings to attach the key to the heart then both were stuck on the flap. The right hand side had one of the ticket sentiments and a thick mdf heart that I had coloured and when I embossed it I used clear sparkle embossing powder and I was unsure if I liked it or not but it worked well on the flap.

Using my Cameo I cut out 5 different sized hearts in bright red card, went around the edges with a dark red promarker then added a slither of acetate behind the heart and attached them in a bunch on the 2nd inner tab, they flapped about and looked good too.


The small triple embossed hearts were set so I stuck a stem cut from mount board on the back of each heart and then a scrabble letter to the front, to get the 5 hearts in a position to see the name I had to do each heart at different heights, I used the red tape to hold the stems on the heart flowers as they were quite heavy.

On the 3rd flap I added 3 silver coloured d
ecorative hearts just as decoration more than anything.

The blackboard heart was dry so I used cerise pink heart shaped brad, and that was placed in the top centre of the heart then Pinflare gel was used to place the heart on the top back of the box.

I added a romantic verse to the back of the box but that won’t be shown as it was private.
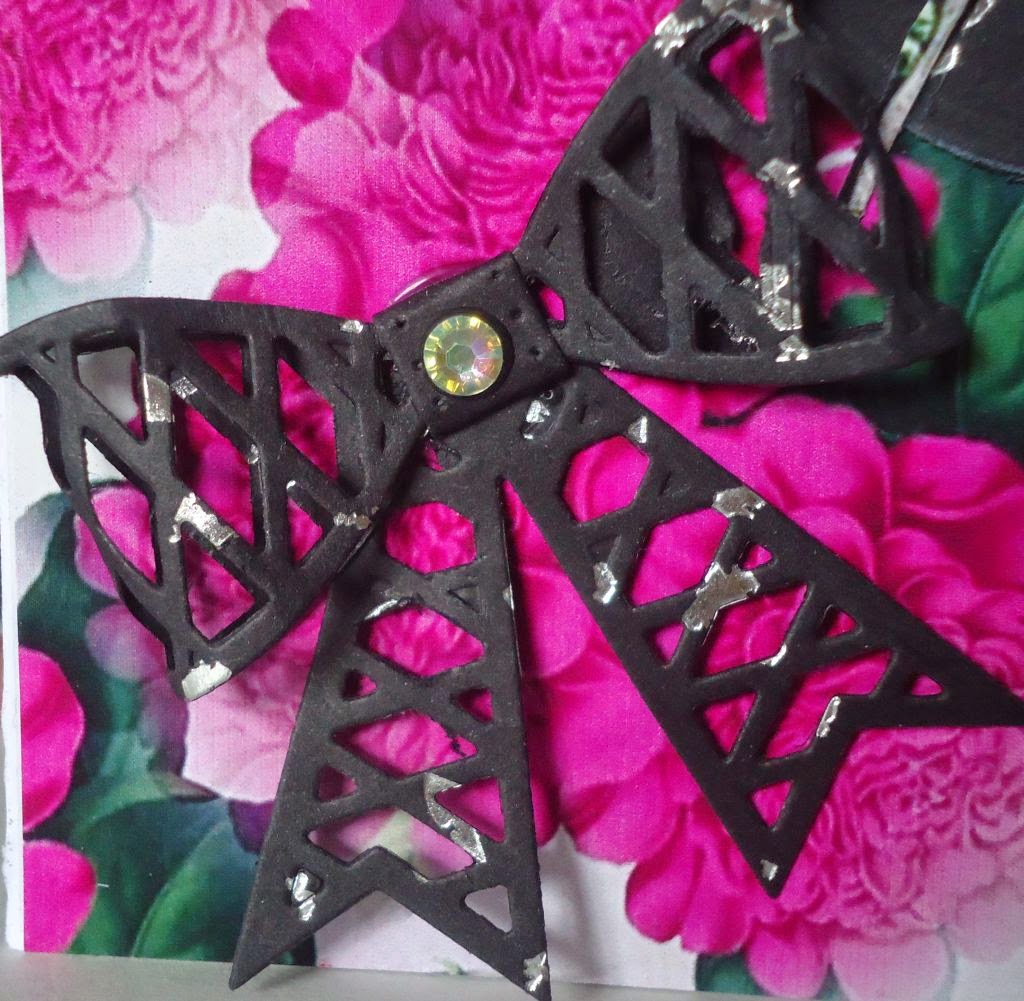
Lastly I used the Cameo to make an amazing 3d heart shaped flower; it had 16 pieces if I remember correctly, and I put it together around a straw, added 3 leaves that were also cut as part of the heart flower, when I wrapped up the box in tissue paper I put the flower in the box and thought it looked like it was a big box of lovely red heart flowers!

The box was a hit – thankfully
Ok that’s me finished for today, so catch you again tomorrow
Hugs
Angie
x

Sunday, 15 February 2015

Tea Rooms


Evening

When I first saw this kit I couldn’t wait to do it!!
It’s one of the new kits by Sandie Burchall and has just 4 sheets of printing to make this amazing card


The kit is called Tea Cup Tea Shop Front kit and to make it I trimmed away the excess paper around the edges and most of the pieces were then sprayed with Stick & Stay then pressed onto smooth white 300gsm card, the pieces were then all cut out and I was ready to go.

To start with I scored and folded the main card structure which is a tent fold with front flat flap for the pavement.

The shop front was cut out and stuck to the front of the card base not touching the pavement, there was also a roof section that went on the back of the card and a big section to add a sentiment, I added a special verse to the card which is hidden in the photos as I have made this for someone so don’t want her to see it.

The decoupage was mostly easy to cut out, as in the shop front which had 3 pieces to cut out but it was all straightforward. The parasols should have had the frilly bit but it was so messy when I had cut it out so I cut it all off...problem solved.


As well as the main card there is a matching gift tag, I have propped the gift card up on the back to hide the verse as I said earlier.

I love the card but it’s a shame there’s no real scope for changing it or adding my own things to it other than the flower soft I added to the hanging baskets and pompom trees by the door which I did after taking the photos.


And that’s it finished;...I hope you like it, I have a couple of others that I plan on doing this week sometime – I hope!!!

Ok its coffee time then I am planning on an early night tonight as I was up till almost 5am this morning.

See you tomorrow
Hugs
Angie
x

Saturday, 14 February 2015

Ukando Kit Challenge!


Hello

The card I am showing today is one I made a couple of days ago

Some of you will know that I have an online craft forum (Ukandocrafts) and like my blogging it had been under used of late so I set up a card challenge which was a huge success and to follow on from that one of the members Lorne set up challenge number 2, that was each member had to send out a kit to the chosen partner, the partner then had to make up a card using the kit and anything from their own stash

When the kit arrived with me I emptied everything out and instantly saw what I wanted to do – but I wanted to also change the colour over, my partner had sent a blank card and envelope that were like a green gold colour, she had added an A5 sheet of black card and lots of white die-cut pieces and some self adhesive gems in black and greys.

So to start I folded a sheet of 300gsm smooth white card into a 6x6 card. The piece of black card was cut down to fit the card front, and then punched all 4 corners using a fancy shaped punch that also cut a heart out. I used double sided tape to stick the black to the card base.

I put the largest square die cut through the big shot and using the Tied Together embossing folder, added foam tape to the back and stuck on the card, the hearts in each corner were great markers for this.

In the kit were 4 plain butterflies in decreasing sizes, so these were embossed with Swiss Dots embossing folder, I lightly rubbed Tim Holtz Black Soot distress ink pad. The largest butterfly was used to create a pocket; I used foam pads along the edges leaving the top free and stuck the butterfly on the white embossed square, shaping it so my tag would go in and out easily, the size smaller butterfly was again coloured a little with the black soot then diluted pva was lightly patted over it and the butterfly dipped into a pot of glitter and set aside to dry.

I did the same in the top right corner but this time stuck the larger butterfly to the square panel and the smaller one once dry both smaller butterflies were glued down the body and stuck in place, the wings weren’t stuck down.

There was a large die cut that had flowers and swirls so I cut this into several sections, I used the flower and some swirls, dabbed in black soot and then stuck in the top left corner.


In the centre of the square I added a small heart and the word love...
Also in the pack a heart border so I cut that into 2 pieces of 4 hearts, a 3 and a 2, gluing lightly along the top of the hearts then used them to edge the inner square.

The lacy heart was stuck to a scrap of black card, then a length of 3mm black ribbon was stuck to the black then the heart was stuck on the black again and cut out so hiding the ends of the ribbon. The heart slides into the butterfly corner.

One of the lacy butterflies was stuck to the last of the scrap black and cut out; I stuck this to the back of the card.

Onto the decoration, I used white 4mm pearls which went on the shaped corners, and some 3mm black glitter peel off gems were stuck inside the heart cut outs and 2mm were stuck on the white square where the design crossed

My partner has now received this card and her comments made me a happy bunny...I loved the challenge, loved the kit and loved the finished card too...just annoyed that I managed to get a mark on the back of the card.

Back again tomorrow with something new
Hugs
Angie
x

Friday, 13 February 2015

Floral Frenzy


Morning

Something to brighten the day for you today, it’s a dull and very cold day here so just looking at this card makes me feel warmer.

I have made this to be entered into the CD Sunday challenge Blog where the theme this time is Floral Frenzy, and this is my take on it!

I used what I think has to be in my top 5 favourite cds, Bloomilicious by Cupcake Crafting and this is from set 11

To make my card I printed out the decoupage sheet, the open centre insert and 2 sheets of backing paper, I also used an A4 sheet of white card and a sheet of black with silver foil embedded in it 

The white card was folded in half to make my A5 card. I trimmed the outer edges of the insert and then cut out the centre. I folded one of the backing papers in half and cut it, then folded one of the now A5 pieces in half again, put double sided tape on the back and stuck the pieces into the centre of the white card, I cut these in half as sometimes it causes problems with closing the card if it’s put on it one piece.

The insert was folded in half, then each half was folded again to create the pop out insert, this was stuck in place using double sided tape on the outer panels only.

I used Papermania punches to punch 2 butterflies and 2 loopy flowers. I used a length of fine silver thread and stuck the 2 butterflies back to back with the thread through the centre and the same with the loopy flower, the thread was stuck in the centre fold, a small piece of sticky tape was used to keep in place.

The front of the card was completely covered with the remaining A5 piece of backing paper. I cut out the 5 or 6 pieces of decoupage and used Pinflair gel to build them up, I shaped the top 3 layers which were the top flower, shaping gives dimension instead of everything left flat.

Last year I was at a show and someone was selling packs of dies for £7, in it were up to 8 dies in different shapes and sizes, I hadn’t even opened the 2 packs I bought but i was looking for something different to cut a mat for the card and came across the packs and in one was the perfect shape...I think this shape is lovely, most dies have mirror image of each side whereas this doesn’t!


So I used the lovely black card that has silver foil embedded randomly into it, I struggled to find a colour card that complimented the design and black seemed to be the best option. The mat was cut as was the 3 pieces of small bow.


The mat was stuck to the card with Cosmic Shimmer pva glue, the floral decoupage was then stuck to the mat again using the pva glue.

I folded the bow and added the centre section used pva to glue together and then added the “legs” and stuck the completed bow at an angle in the bottom left corner and a pale pink mottled gold foiled Best Wishes sentiment was in the bottom right corner.

To finish the card I simply added 3 glitter gems to the top left corner, a clear ab gem to the centre of the bow, each side of the butterfly and loopy flower in the centre.

And that is the card all finished. I think I am addicted to the inserts with the cut outs, they just change the card from a pretty card to a WOW card!!

Right back to the craft table – have a few things I really need to be cracking on with
So see you again tomorrow, please leave me a comment as I love reading them and knowing you like my cards is a big boost...thank you

Hugs
Angie
x

Thursday, 12 February 2015

The Bra Challenge!


Good evening

I said this was something different...well I might have told a porky....

It’s not a card, it is an mdf plaque

My friend and I challenge each other and this challenge was the mdf plaque and it must have at least 1 charm on it


I thought I was all sorted with mine, I have bought some different types of paint for things like mdf so slapped on a coat of Americana Decor Chalky finish paint, its water based and didn’t take too long to dry then I added a second coat but then wasn’t sure I liked the finish so I painted a 3rd layer but used Imagination Crafts mdf paint in Cream Gold...when it was dry I hated it. So it was a rub down then a light coat of the white again and once that was dry I used a sanding block and randomly rubbed away paint


On to the decoration..I honestly had no idea so started gathering stamps to try out...opened a big drawer with clear stamp packs in and as I opened it too much it fell out and landed on my foot...I am now sporting a pretty coloured bruise – for its the 2nd time this has happened in a week!! But anyway as the stamps flew around me I spotted the perfect set for this plaque...it was by Inky Doodles and the set I chose to use was The Wonder Bra


I started by stamping the verse on the far right hand side followed by the bra at an angle in the centre and 3 pretty flowers down the left side. I used Versafine Black Onyx ink and it stamped perfectly on the painted surface

Stamps cleaned and put away I got out the pro markers to do the colouring only to find they don’t like the painted surface...I got dark colours to work but didn’t want those – so I tried Gelly Roll glitter pens and they did the job – I couldn’t get a good even colour but I was looking for the shabby look so it worked ok. I used a few different gems to add to the bra and the verse which added pretty sparkles


After the colouring was done and had dried I turned the plaque over and covered the back with some lovely backing paper I had come across.

When I’d finished the painting I used my fab upper and lower case alphabet stamps from what was Dimension Stamps, I stamped onto some blush textured card using Sepia ink and then over stamped with a small butterfly in bright orange in, cut out the letters and found then too big to use

But the back only had backing paper so the letters were perfect for a name, so they were stuck down using Pinflair gel as I though with it being heavy and textured it needed more grip and the Pinflair goes off quicker than the cosmic shimmer.

I tried for over half an hour to thread so fibres to use as a hanger but had to admit defeat and instead used some pink and white butchers twine; I knotted on the back and threaded it rom back to front at the right and slotted on a butterfly charm and a 2nd butterfly charm this time upside down then threaded the twine front to back on the left and knotted it. Once the hanger was held up the butterflies hung down!! Challenge over...

But....

I opened up a magazine a day or three ago and saw a card that had a small bulldog clip holding a charm so I used that idea, I chose a cerise pink bulldog clip and used 5 jump rings, 2 were added to a Cancer Ribbon charm and 2 to a heart charm, the 5th ring went through both of those and also through one arm of the bulldog clip, the clip was then attached to the right hand side of the plaque.

It was all parcelled up and sent in yester5day;s post so I am certain my challenge friend Paula will have it by now – if not she will know what’s coming!!!

See you tomorrow
Hugs
Angie
x