Hello my
blogger friends
Its my
adorable grandson Laytons 5th Birthday this Thursday.
Because he is having a party at one of the kiddies adventure play
parks after school that day we wont get to see him but have been
invited to tea on Wednesday so we can take his cards and presents
then
Well
presents are never hard to buy for 5year old boys – in fact we saw
a lads construction type kit just after Christmas so bought that for
him, then 2 weeks ago his mum asked would we buy him some more Lego –
he wanted the fire station and 2 of the 3 fire engines – well the
answer was simple – NO! We agreed to buy a fire engine and they
bought the other – he had one bought fr christmas so now has the 3
– he can save any money he gets to buy the fire station which I
believe is around £40.
Every year
I have decided at the start of the year I will make the lad a really
special card – but as with past years I put it off time and again
until today I knew I had to do something.
So I
browsed some folders and came up with a craftsuprint sheet – it was
to be used as a basic 6x6 card or could be made into a shaker using
the spare frame.
Well I
didn't do the shaker and decided to make the card my way!
And this
is what I did!!
So
materials for this card I used ….
Heat mat
to work on and protect your surface – I always use it...
brown a4
card
Printed
sheet
A5 piece
orange card
4 buttons
peel off
letters and numbers
Martha
Stewart bird on a branch border and corner punch set
ultra fine
flowersoft in sand and toffee
Sticky
pads
Eazi Score
Board & tool
Tonic 8”
guillotine
Scissors
Tweezers
Shaping
tool from www.dimensionstamps.com
Foam
shaping mat – stamping mat or even a mouse mat
To
make the card …
The brown
card was folded and scored then the orange card was trimmed down to
fit the card front.
I punched
the top 2 corners and then used the border punch to punch the bottom
The sheet
was then stuck to the card with double sided tape.
I cut out
the main area of the card, then all the decoupage and built that up
with tiny sticky pads.
The extra
frame was cut out and stuck onto the base frame using thick sticky
pads.
This panel
was then stuck to a sheet of mid brown card and them onto the orange
card – I positioned the panel to fit just under the punched corners
leaving room at the bottom for some peel offs.
I stuck
the Happy Birthday Layton onto a scrap of gold cad then stuck across
the top of the card using tiny sticky pads.
At the
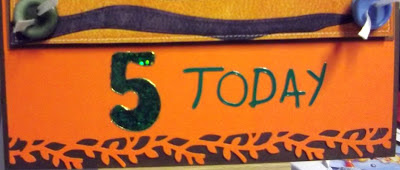
bottom of the card I stuck a large number 5 and the word TODAY next
to it.
To
decorate the card I added 2 green and 2 blue buttons that had a scrap
of white ribbon in each – these were stuck in the card corners
using Pinflair glue.
Once that
set I used a Sakura quickie glue pen to outline the white fluffy
clouds then covered with glamour dust – the same with the tiger and
panda face.
PVA was
added to the lions mane quite thickly then I covered with toffee
ultra fine flowersoft.
I did the
same for the sun but covered that with sand flowersoft.
All in all
the card hasn't turned out too badly – has it?
And that's
all there was to it!
I know I
say I want to do a special card but have no ideas at all as to what I
would want – then did this and just know he will like it – he
takes a huge tiger to bed!
Will let
you know what he though of it when I know
Catch you
again tomorrow – same place folks
x


so cute
ReplyDelete