Monday, 31 December 2012

Goodbye 2012


Happy New Year – well almost!

I still have every intention of sharing cards but again spent best part of the day sorting out my craft room – just hoping one more day will see it all sorted

BUT – I have decided to renew last years resolution – to share hopefully a card a day – if not a card then something!

On the whole I didn't do too badly through 2012 did I?

I had my lovely stay with Jae around Easter so missed a day or two then – then I think that was about it until I fell ill in October and missed about 2 weeks

But have been hit and miss throughout December with this illness that just doesn't seem to want to leave me..

I think its down to you my friends that I am renewing the resolution as I have had some lovely emails and texts saying just how much you all get from the blog – so obviously I am doing something right!

I must just mention one of our long standing class ladies SUZANNE who reads my blog every day – I had a text from her this morning to let me know she wouldn't be in class this coming Thursday (my birthday just in case you didn't know) as she has had a nasty fall and broken her hip – she was in theatre last night for a replacement hip – as she has major mobility problems anyway this is just the worst possible thing that could happen

All her children are grown up but live all over the world – and she keeps in touch with then through Skype – she would have been up all hours to share the New Year with each of them – but sadly that wont be happening now...

And just talking of Suzanne – one of her son's Lee recently had some fabulous news to share...so if you can spare a few minutes please watch this and remember his name is LEE


Anyway I have just run myself a lovely hot bubble bath as I ache like crazy – my knee is now 50 shades of blue, black and yellow following the bump it took...but its not so sore when I move now.

Before I forget – my New year cake arrived this morning – if I wasn't feeling so lazy I would pop down and get the camera – but it will have to do tomorrow

But its a HUGE thank you to RUTH for another fab creation – I asked for a cake like the girls had for their birthday but wanted it to be filled with fresh cream and covered with chocolate sweets – the girl did good!

It looks great – smells heavenly and tastes better than any cake I have ever eaten – so well done Ruth!!

I even remembered to take some piccies of the cake once it was cut!!!!

The fireworks are going crazy and its only 9.30pm – our dogs hate them so once Pete had walked them that was it – they hid in the darkest place possible – well at least Wil did – Fern is laid over my feet under the desk whereas Wil is sat on the stairs in the dark – took some piccies on my phone so will transfer to the PC and share tomorrow – if they turn out that is!

Oh and something else that will be happening with my blog is 2013 – give-aways!

I tend to make far more cards than I will ever need so at least ONCE a week I will put a card up for grabs...all you have to do is place a comment on it – I know some of you seem to struggle to leave messages on the blog so if it helps to use email or text that's fine – I will number every comment and get one picked out and that lucky person will receive the card and envelope with insert attached and unwritten so you can use it yourself

But then thinking about it – I could offer an atc – or a complete kit to make your card...same rule as above – comment and go in the draw.

If anyone can write me a quick and easy tutorial on how to post a message on this blog I would be so grateful – I could add it so people can have a go!!!

Cant think of much more to say except

Goodbye 2012

and welcome

2013

Saturday, 29 December 2012

Changing Room


Hi again

No card today I'm afraid!

I got up this morning and decided I was going to do something with this craft room.

When Katie gave me all her craft items she also gave me her desk with shelves to go up the wall – she had them all made to her requirements and I know they will make a big difference to my craft room too.

So I started to move everything from my big shelving unit and desk – everything was neatly pile up at the other side of my room.

I had to take the desk to pieces – I suppose I could have offered it free and had takers but I didn't have the time and also when you offer something for free you would think someone would jump and say thanks – but from experience I get how big, condition, can you store it for a while – will you deliver etc – so now its good for firewood and nowt else!!!

I brought the very heavy desk pieces in from the other room and soon had it all put together – but I couldn't lift or flip it so had to ask for Pete's help!

We got it in place – and the shelves – then found I couldn't get the monitor in the section it had to go...so change of plan...

I moved a large set of plastic drawers with rubber stamps in out to the other side of the room – spun the under unit table that came with the desk into the space where drawers had been an balanced one of the shelf units over it and it meant the printer would fit there too....

Well I have filled and unfilled the bloody shelves – Pete would pop up here and say the under unit isnt strong enough to hold all that were on the shelves – have to admit I filled one of the shelves with A3, 12x12, 14x14 and 16x16 card – around 600 sheets in all...so now thats back on the A3 card storage unit!

As you can imagine – this room is a tip...I worked so hard on it but knew it would take me 3 or 4 days in all.

We got the PC set up and it kept dying on me – Pete would sort it do something and again it would die – got it going but printer wouldnt work – seems I put the plug in the wrong place at back of the printer – anyway in the end got the printer and the PC going perfectly

Had a message from my neighbour to say her son and his partner had just had a baby boy so found a kit – printed it out and sat and made the card while watching tv.

Came to print a single sheet to make a quick card only to find my external drive isnt showing up – have had to call on crafty friends to help out – and quickly!!!

The day has seen me in considerable pain – many of you will know I had a total knee replacement in March 2010 – its wasnt a success so Im now waiting to have the kneecap on that knee replaced...well when I was breaking down the old desk I somehow managed to strike that knee on a shelf – boy did it hurt!!!!!!! So now I have a knee in 50 shades...but why if its a metal knee does it hurt like hell when knocked????

And one of the plastic shelves slipped down my arm taking the skin from the wrist and 2 or 3cms of my inner wrist – ouch – now that is sore!

And I've just got out of a hot lavender bubble bath – but when I put my hands and arms in they stung like crazy – cannot believe how many niks, cuts, scrapes etc I have....

On that note I will sign off for today....and will try get some pics of the 3 or 4 cards I have got made up to share

Bye for now

x

Friday, 28 December 2012

Angie's Stamps


Hello

Yesterday I mentioned I had at long last made a start on something I had wanted to do for ages but with christmas and the like it never got started

So this is it!


It is an A5 rubber stamp holder

I actually bought the basic kit which is – the 2 pieces of board, 2 book rings, an oval cut out and around 6 sheets of thick acetate punched to fit the album – from www.alysinkyfingers.co.uk and intended on using it for the project club kits.

I started by painting the board covers – one side is pink the other is blue, and I used the lovely B&Q sample paint pots, funky metallic effects, they are only cheap but just keep on going, I think it was something like £2 for 3 pots.

Anyway back to my stamp holder...

Once the paint was all dry I put the book together – mainly so I didn't misplace any of the pieces

I randomly stamped a sheet of card using a Dimension stamp that had swirls, hearts and flowers, I used some inks I had bought in the year and never opened – a ColorBox wheel of Petal Point fluid chalk ink pads – Blossom Pastels – in pinks and purples.

The heat gun was quickly passed over the page just to be sure all the ink was now dry then I used the Dimension Stamps plain alphabet to spell Angie's stamps – they were stamped using black Versafine ink pad and then cut out.

Now the messy bits – I inked each letter well with Versamark ink pads and covered the letters with clear embossing powder – heated then up and repeated so each letter was triple embossed to give the super shine and this also deepened the colour of the stamping too.

The letters were all set aside to cool completely and while I was waiting I painted the oval piece in purple metallic effects paint and put to one side to dry.

Onto the large flower – I have never really made one of these before, I have watched Roy from Dimension stamps lots of times and even have one of his flowers in my craft room...

At the last craft day we did at our building the ladies were taught how to make these flowers and I watched – but that was all...then when I gave the kits to people who hadn't made the day I did show them how to make them up so I had a good idea.

I used a sheet of 250gsm paper to start with, stamped my image 3 times in black then stamped inside the petals using the stamps provided in the set – I should add here that the flower was from www.dimensionstamps.com and the set is called Petal Passion, it has the large and medium shaped petal flowers, a small smoother edge flower, 6 stamps to use inside the petals as decoration, a lovely flower swirl with extra flower and a wonderful Friendship verse – all for just £10

Back to the paper flower – it didn't work!!! It was far too flimsy so I started again using a 300gsm smooth white card which is what Roy suggested on his You Tube video.

I stamped veins into each petal this time using black versafine ink for all the stamping

I cut out the stamped flowers and then coloured them on the top and bottom using the same petal point colours – lighter in the centre working to darker around the outer edges.

I then followed the tutorial on which segments to cut and how to curl then make up the flower.

So the flower was completed and as I used glossy accents as a glue I used it to dot the petals and then sprinkled glitter of it.

Back to the letters now, I laid them on the book front until I was happy with them then used pin flare gel to stick the letters down.

With the oval I rubbed the edges with my Tim Holtz sanding pad to distress it lightly then used the Pin Flare gel to stick it between the wording

The flower was attached to one part of the oval with pin flare gel and then I found a lovely white acetate label that was embossed with white glitter around the edge and had this saying “Do All Things With Love” so I thought it was perfect to go along side of the flower – as it was acetate I used some invisi dots to hold it – and was gutted to see they showed straight through....not sure what if anything I can do now to cover them...I tried to take the label off but it would have made a mess so left it...I'm thinking of maybe trying to do an inner border of tiny gems as they would cover majority of it and hopefully help...any suggestions please?

The last thing I did was add a pretty acetate heart to the top right corner – its glittered around the edge and has text printed through the heart...the photo didn't show it properly as I was so close it all blared

So there we have it – so far – and I am so pleased with it...I wont rush it as I want it right...

Would love to know what you think to it please...

See you all again next time

x

Thursday, 27 December 2012

Ahoy Shelf Card


Evening friends

I have enjoyed some time in my craft room today – I did a project I have been longing to do but had so many other things that took priority and I didn't want to try rushing so left it until I knew I could devote some real craft time...its not quite finished so will hang on with it for now.

Its our youngest grandson's 3rd birthday on 10th January so I decided I would make his card today – I began the search through the 100's – well almost close to 1000 kits I think in search of something nice and different.

My first choice – and I did print it all out – was a fab blue elephant fancy folded card but Pete said it was far too babyish...so have that printed for another time.

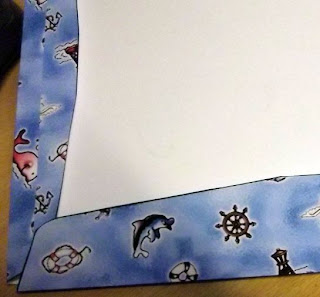
In the end I opted for a kit called AHOY SHELF CARD designed by Crafty Gals Designs and bought from www.cardmakingdownloads.com

I am sharing it but if anyone has done this kit or something like it and can help me out I would be grateful...before I bin it!!!!!!!!!!!

So materials for this card I used ….

Heat mat to work on and protect your surface – I always use it...

The printed sheets, 6 which includes 2 sheets for envelope

Baby blue A4 card

Sticky pads

Eazi Score Board & tool

Tonic 8” guillotine

Scissors

Tweezers

Shaping tool from www.dimensionstamps.com

Foam shaping mat – stamping mat or even a mouse mat

To make the card …

I roughly cut out the main base sheet and the shelf sections then sprayed them all with Crafters Companion Stick & Stay and pressed onto lovely pale blue card stock.

These and all the decoupage were then carefully cut out, and the dashed lines all scored and creased sharply.

The decoupage was easy to cut out and I built it up with small sticky pads.

The main base had the large centre panel cut away then scored on the folds to create the basic tent/shelf card.

And then I hit the blank wall!

How on earth does this thing go together?

The instructions with the kit are a waste of paper – and although there are 2 colour sheets of the kit and finished card neither show just how it went together

I have tried several different ways but I am worried now that if I don't go careful I will damage it and it will have to be binned.

I thought it would have just folded flat to go in the envelope but it doesn't – which leads me to think there should be another score line somewhere that itsn't actually marked on....so if you can help please email, reply on her or ring/text me

And then we have the envelope – so far its just printed and scored then folded but not stuck together – I wanted to point out how poor the designer has been in checking this kit prior to putting out for sale – one of the sides has a clear line down it and the pattern does not line up in any way!!! And the other thing I am annoyed about is the top and bottom sheets of the envelope are different shades of blue – I have printed them both twice and its the same result both times!!!

Right then – I await all you crafty folk contacting me to help solve the shelf card problem

In the mean time I will spend a little more time on my other special project and it may well be ready to share tomorrow

But first I want to have a nosey at some new cds I had arrive today, watch this space as you may well see something from them in the next few days or so too!

Take care

Bye for now

x

Wednesday, 26 December 2012

Baby Blues


Happy Boxing day

We have had a lovely day again – just a take it as it comes time – we had a flying visit from my lovely friend Pat to exchange christmas pressies and then a young friend of ours came for tea so we had a few hours of fun in the WII...

Now she has gone home so Ive had a bath and snuggled into my lovely new super soft fleece dressing gown ready to watch the TV when Pete is back from his dog walking!

I've not made a card since last week but have been cutting out and I feel now I want to be back in my room …maybe tomorrow!!!

Today's card was made for a lady in class who's daughter had her 2nd son a couple of weeks ago.

All I know is the sheet was purchased from www.craftsuprint.com

So materials for this card I used ….

Heat mat to work on and protect your surface – I always use it...

The printed sheet

Baby blue A4 card

Blue glitter card

Glamour dust

Sticky pads

Eazi Score Board & tool

Tonic 8” guillotine

Scissors

Tweezers

Shaping tool from www.dimensionstamps.com

Foam shaping mat – stamping mat or even a mouse mat

To make the card …

I folded the baby blue card stock in half to create the A4 card blank.

The images from the sheet were cut out and the decoupage then built up using mini sticky pads

I cut a piece of blue glitter card and stuck it to the right hand side of the card front then stuck the base image to the card front – the lettering stands out nicely against the dark blue glitter card.

Once all the decoupage was built up I used a quickie glue pen to highlight where I wanted the Glamour Dust and then sprinkled it and shook off the excess.

Before I printed the sheet off I added Congratulations Kath & Albert which made it stand out

A lovely sentimental verse about grandparents was printed in the insert to finish.

As I said above I feel I need to be in my craft room now so I am hoping to get something made tomorrow to share with you as just lookigng at the cads I have to share and they are all christmas – so its time to get my finger out – especially if I plan on a card a day again for next year – is that what you want though?

Back again tomorrow

x

Tuesday, 25 December 2012

Christmas Day 2012


Merry Christmas To Each And Every One Of You.

Its Christmas Day and I don't know about you lot but we have had an amazing day!

It started when we rang our grandson Layton – who is 5 next March – as soon as he picked the phone up he was so full of excitement and got so out of breathe telling us Santa had been, he had eaten his treats and Rudolph had too...and that Santa must have thought Layton was a really good boy as he brought....and that was it – the list went on … and on … and on – then we are told he isn't spoilt – yeah right!!!

Then it was bird in the oven and vegetables prepared – Pete went off to collect the girls and Layton and that child's face when he opened the living room door to find Santa had been to grandmas too!

We had the christmas ritual – grandma hands out a few pressies each then we open them – well Layton squealed with excitement with every gift he opened – even down to the sweets and chocolates!

Dinner was served – and the family bloated – so much so we didn't even manage to try the christmas pudding but not to worry...

We pulled crackers and another ritual – I always slip in a scratch card – and we buy small gifts for each other for the crackers – well Layton loved his wind up touch – so did his mum not having to buy endless batteries when he forgets to turn them off!.

Everyone happy with the cracker toys – so now its scratch card time – we have a winner – LAYTON scratched away to reveal £10.00 win - so glad it was him...so he will be off to the toy sale for something Santa may have forgotten!

Anyway the afternoon continued – and I decided we should have some snow...Pete had bought me my own snow so read the instructions and we all filed into our small kitchen – certainly not big enough for 5 of us really!

So this egg cup sized glass had the dry snow poured into it and was then topped up with water

Layton's eyes were close to popping out when he saw the snow appearing...and he touched – so I touched – and in turn so did the girls and then Pete – but Pete scooped some out and threw a snowball at me – so all hell broke loose!

It was like a carry on film – with tiny snowballs flying across the room...

But then...the pot falls over...every one just stands and stares as a pile of dry snow scatters across the kitchen floor

So I did what anyone would do – I think – I poured half a jug of water onto the dry snow and yes we got loads of it...so Layton steps in it and skidded before landing on his bottom...oh we did laugh...it really was good old belly laughs – side splitting laughter...and it went on for around half an hour until Layton was bored falling over with every step.

It was only then when we attempted to clean it all up we found it is was similar to silicone – so just would not clear up.

In the end as much as possible was swept up then it took almost 2 bottles of Mr Muscle and Flash kitchen sprays to get the floor clean!!! It honestly was like a skating rink!!!

Shortly after that Layton wanted to go home to play with his new toys so Pete took them...

What a fab Christmas Day....

But the joy continued for us as we are huge fans of Chumbawamba who sadly had their last ever performance on 31st October 2012 and we couldn't get tickets – but thankfully they did get the whole show recorded and the DVD was released 2 weeks ago – it was the perfect pressie for Pete so we sat down and watched that 2 hour performance and what a bloody good performance it was too...

It had old and new members and they sang song after song – all the songs we know from all their albums

Phew...a real Christmas to remember for us.

As I said we had lots of beautiful presents = everyone a surprise and there is nothing at all I didn't want or like

But I have amazing friends too so I will add thanks here to

LIZ – that die was the one I drooled after – thank you

PAULA – I love the smellies but that stamp set was fab – thanks

PAM – I adore the smell of Lavender and that was one hell of a gift – thank you so much.


And lastly...a huge thank you to Barbara W from UK ATC Group, I joined in the 12 days of Christmas swap – so we had to buy 11 smaller crafty items and for day 12 a special gift...then we were given a partner to send to...my partner was Barbara


I thoroughly enjoyed opening my pressies every day and every single present was so useful to me...I am so happy with it all – I just hope you are with what I sent you Barbara..

I am going to finish here now or I will be writing my first book!!!

So I hope you all had an enjoyable Christmas Day

Be here again tomorrow

xxx

Monday, 24 December 2012

Double Picture Pop Up


Happy Christmas Eve to you all!

Well as we all say every year – that's it – if I forgot something – TOUGH!!!

I've had a lovely day – did my baking, a bit of last minute cleaning – then had my long time friend Paula pop over for our Christmas Eve ritual...a mince pie or two, a slice of home made quiche and a cuppa! Then exchange our pressies...

Then this evening its been a lazy one so far – just watching TV and cutting out decoupage ready for my next lot of cards!!

So today I am sharing the 2nd Golden Wedding card I made for Pat & George...this is a lovely and quite unusual kit by Sandie Burchell called Golden Roses Double Picture Pop Up 3d Card Kit
and it was purchased from www.craftsuprint.com

So materials for this card I used ….

Heat mat to work on and protect your surface – I always use it...

The sheets needed for the card and envelope

Cream hammered card

Glitter in clear and gold

Crafters Companion Stick & Stay

Double sided tape normal and red

Sticky pads

Eazi Score Board & tool

Tonic 8” guillotine

Scissors

Tweezers

Shaping tool from www.dimensionstamps.com

Foam shaping mat – stamping mat or even a mouse mat

To make the card …

I printed the sheets then roughly cut out all the sheets then sprayed the back with Crafters Companion Stick & Stay, after the 30 seconds they suggest I pressed them onto the smooth side of the cream hammered card and cut them all out.

The main card was then scored and folded to create the basic card blank.

I cut out the fan and panel decoupage and stuck to the card front with small sticky pads.

Next I cut out all the inside elements – I scored and cut where indicated on the sheets and it was surprisingly easy to put the pop up/pop out panels together

All sections went together perfectly first time so I was so pleased I went with this one – when I first looked at the sheets and instructions I wasn't sure it would go right 1st time..

There wasn't much to decorate either – I sprayed the pop up panels with Crafters Companion gold glitter spray and it looked lovely.

On the front I used some beautiful clear AB gems gluing 1 to each of the fan panels...and then added a little glamour dust to the white flowers.

I added a very loving verse to the back of the card and finished by making the matching envelope.

I would just like to say if you have looked at these cards in the past but them put them back – please be brave – print them out, read the instructions and just enjoy it...they honestly are so easy.

I would just like to wish you all a very merry christmas

Not sure yet if there will be a card tomorrow or not

Have fun!

x

Sunday, 23 December 2012

Gold Roses


Evening everyone

Well I am just about done now for Christmas – shopping done, presents wrapped and the home baking all ready to be done first thing in the morning so I hope all you reading this are the same so you can sit down and enjoy the christmas celebrations.

Today's card is one I made last week for a lady in class (Ena) who just ran out of time to get a special card made for a special lady in our card class – PAT..

It was Pat and her hubby George's golden wedding anniversary on 22nd December 2012

So I had a good look through all the kits I have and found several beautiful ones – knowing I needed to make 2 cards as I wanted one from us I narrowed them down to just 3.

I had previously done one of these kits for Ena who celebrated her Golden Wedding earlier this year so that left me with two.

This card is made for a lovely kit by the talented Janet Briggs and is called Gold Roses Scallop Pocket Card Kit and it was purchased from www.craftsuprint.com although I believe Janet sells her kits on several of the online sites.

So materials for this card I used ….

Heat mat to work on and protect your surface – I always use it...

The sheets needed for the card and envelope

Cream hammered card

Gold narrow ribbon

Glitter in clear and gold

Crop-o-dile and large gold eyelets

Crafters Companion Stick & Stay

Double sided tape normal and red

Sticky pads

Eazi Score Board & tool

Tonic 8” guillotine

Scissors

Tweezers

Shaping tool from www.dimensionstamps.com

Foam shaping mat – stamping mat or even a mouse mat

To make the card …

I printed the sheets then roughly cut out the main sheet, the pockets and the tags, sprayed the back with Crafters Companion Stick & Stay then pressed them onto the smooth side of the cream hammered card and cut them all out.

The main card was then scored and folded to create the basic card blank.

The pockets were then cut out and strong red double sided sticky tape was added to the straight edges only, this was then positioned on the card and pressed into place.

Next it was the tags – so they were cut out and the hole punched with the crop-o-dile, I used large gold coloured eyelets with this being a golden wedding card then cut a length of metallic gold ribbon, slotted it through and secured.

The congratulations tag was placed in the first pocket and the verse tag in the other.

The pretty insert was scored and folded then attached to the card with a small length of double sided tape – if I had thought of this I should have added a verse before I printed it but as I didn't I stamped a lovely sentiment instead.

The card completed just needed glitter adding so I used the quickie glue pen and highlighted sections of the flowers and sprinkled with gold glitter then other sections had glamour dust added.

The 2 sheets for the envelope were cut out and all lines scored and had double sided tape added – carefully I lined the pieces and created the perfect matching envelope which I had remembered to add names to prior to printing.

And that was the 1st of the golden wedding cards – I know Ena was chuffed with it and I am quite certain Pat & George will have loved it too.

See you again tomorrow with another card

x