
Saturday, 22 September 2012
Laundry...

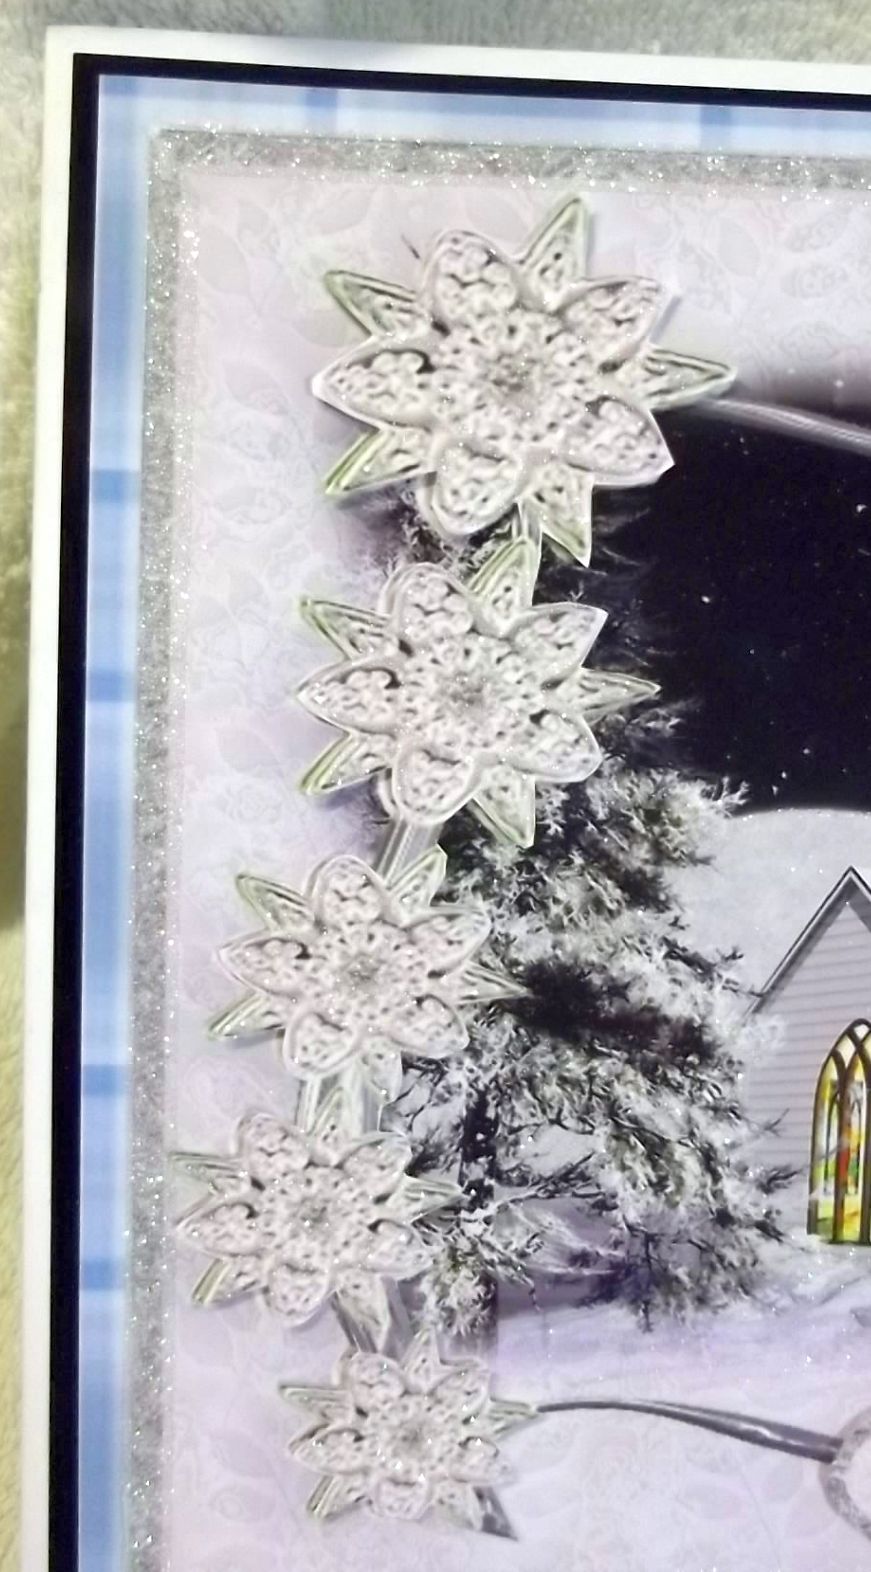
Crystal Snowflakes
Hi
Another card
I made some time ago that just needed to be put onto a card which I
have now done
This is a
lovely image – bought from www.craftsuprint.com
but not sure who was the designer


So
materials for this card I used ….
8x8 white
card blank
Black mirri
card
A sheet of
printed tartan paper
The printed
sheet
Narrow
double sided tape
Sakura
quickie glue pen
Glamour dust
To
make the card ...
I trimmed
the black mirri to fit the card front then stick a piece of blue
tartan backing paper on top.
Then the
base image was positioned onto the tartan paper.
Before I
started adding the decoupage pieces I used good quality narrow double
sided tape around the edges of the main design
I removed
the backing from the tap 1 at a time then covered and pressed in the
glamour dust – returned the excess to the tidy tray
I did this
with each side and loved the effect it gave.
I added the
decoupage and then it was time for glitter again.
The quickie
glue pen was used to highlight the church roof, the tree and the snow
on the ground
I also edged
the cluster of snowflakes down the left hand side of the card with
the glue pen and covered with glamour dust
The
snowflake that's in the centre of the ribbon was covered with PVA
glue then covered with glamour dust to give a solid finish
I carefully
edged the sentiment with the glue pen and covered in glitter


And that's
another finished card!!
Don't you
think the church looks life like with the lights?
See you
tomorrow
x
Friday, 21 September 2012
Christmas ....
Hi
The card I
am sharing today is one I love – I had cut the decoupage out and
made it up some time ago so when I was up in the night a few days ago
I went rummaging through the ready to make box and saw this
Then I put
it away again – mainly because I just couldn't see how I was going
to turn this into a card – never mind a nice card
But then
picked it up again – grabbed a folder that was to hand and filled
with backing papers I have printed off and some time and started to
match paper & image
When I came
to the faded tartan I loved it


So
materials for this card I used ….
8x8 white
card blank
A sheet of
printed tartan paper
A length of
gold sparkly ribbon with a spare piece for bow
And a length
of patterned gold mirri card
Martha
Stewart Snowflake border punch
Sakura
quickie glue pen
Glamour dust
To
make the card ...
I trimmed
the paper to fit the card front
Using the
border punch I started at the centre of the right hand side –
punched down the strip then back to the centre and worked up until I
had the border complete
I used the
strip of patterned mirri card – it was approx 21cms x 2cms
I used a
narrow red double sided tape to attach the strip behind the punched
border without seeing the sticky.
To the left
side of the backing paper I used a length of gold ribbon – turned
it over about 2cm at top and bottom and secured behind the paper
Using the
2nd piece of ribbon I folded it to form a simple loop then
pressed in the centre and wrapped a small piece of ribbon around it
This was
attached to the centre of the ribbon
Double sided
tape was placed all around the back of the tartan backing paper,
backing removed and then centralised on the card blank.
All that was
left was to add the main image which fitted perfectly between the
ribbon border and punched border.
It was
secured with wide double sided tape.
A quickie
glue pen was used to highlight snow and snowy areas which then had
glamour dust sprinkled over it


A perfect
finished card!!
Sorry but I
have no idea where the sheet was from or who designed it!
See you
tomorrow
x
Thursday, 20 September 2012
Dragonfly Delight
Hi
Got up this
morning feeling pretty rough to say the least...
As the day
went on it was very obvious I was starting with a cold – great –
that's all I need! I'm just hoping it passes as quickly as it came.
Enough of
feeling sorry for myself …
Today's card
has had great comments from everyone who has so far seen it
I bought
this from www.cardmakingdownloads.com
a week or two ago as the colours really caught my eye
The sheet
was designed by Gillian Hutchinson better know in the craft world as
Simply Sumara this is here website and well worth looking at
www.simplysumara.com

I used a
sheet of Adorable Scorable card from Hunkydory – its like a pinky
lilacy colour – this card is great as it will fold by hand and
there are no creases from it....

So I used a
score board and created the A5 card blank, after I trimmed the base
image I used double sided tape to attach it to the card blank, I left
a narrow border down both sides and across the bottom as I will
probably add a sentiment along the top when I know what event the
card is needed for.

There isnt a
great deal of decoupage but what there is needs your attention to cut
cut it out – its the flowers and leaves cluster in the bottom right
hand corner...

Once they
were cut out I used medium sized but only 1mm thick sticky pads
throughout.

After
cutting the 3 sections of dragonfly I used a Sakura quickie glue pen
to highlight the wings on each layer and then covered with iridescent
glitter
To attach
the dragonfly I used a narrow slice of double sided tape just on all
3 of the bodies and stuck in place
The wings
really do make the dragonfly look lifelike....
There were
other parts of the card that were also glittered
It really is
a wonderful card!
See you
tomorrow folks...I promise to wear a disposable face mask so I dont
pass on this cold...lol
Bye till
tomorrow
x
Wednesday, 19 September 2012
Posting Day
Evening all
I had a poor
nights sleep so rather than head for the TV I decided to start making
up some cards from the many many decoupage toppers I have ready
I print out
sheets – cut them out – make them up into a topper than drop into
a box – there must be 50+ just waiting for a card to be done.
Well this is
a card I made up while at Malham last weekend
It was a
lovely kit from one of my favourite sellers Lynzeys Place
http://www.lynzeysplace.com/index.php?p=1_84_Easel-Christmas-page-2
that will take you direct to the page with the kit on
This kit is
called Easel Christmas Set 66
The kits
from this site are great value – its 50p for up to 3 sheets and
then 4 or more sheets is 75p... I have just bought a sheet that has
around 8 sheets to it...

So I printed
out the kit which was the easel, the main image, the stopper,
decoupage & sentiment and 2 pieces for the envelope.

I roughly
cut out the easel and main image and then sprayed the backs woth
Crafters Companion Stick & Stay then stuck these to white card
stock

The pieces
then were all carefully cut out, the base was scored in half then the
top piece in half again

The base
image was then attached to the folded front – I added the decoupage
at this point using very thin sticky pads.

For my
stopper I used a piece of printed self adhesive Christmas ribbon then
popped a sentiment in the centre – this was built up using thick
sticky pads

To decorate
the card I used small clear AB flat backed gems when printed snow was
all around the design

The top of
the post box was covered with a generous amount of PVA glue as was
the girls hat and coat fur trim – then I covered with iridescent
glitter
Glossy
Accents was added to her little helper and a letter.
The envelope
was easy to make up – both sheets were cut out and then folded on
the lines shown – double sided tape was then placed over these and
both parts pressed together
Its a lovely
card – more so because it comes with the matching envelope.
More like
this tomorrow friends
x
Tuesday, 18 September 2012
Snowballs
Hi again
This is a
fab card – it will work as a 6x6, 7x7 or as I have used it 8x8
So to the
important stuff first
The sheet
was bought from www.cardmakingdownloads.com
and was designed by www.Cards2Craft.com
It is called
Penguin Snowball Topper Sheet
I started by
creasing a bought 8x8 scallop edged card into my card blank

A sheet of
pale blue snowflake backing paper was added to the card blank to
leave a narrow all round border

After
cutting the main image out I matted it to a piece of blue holographic
mirri card and punched one edge which looked lovely.

I matted the
main image piece to the blue holographic mirri then stuck it to the
card blank – I moved the main sheet over so the punched border was
in line with the edge of the scallop and secured into place.

As I had a
blank top left corner I couldn't decided how to fill it so used a
couple of www.stampsbychloe.co.uk
buy stamping the large poinsettia and 2 smaller onto a piece of the
paper from the background

I used
Versamark to stamp then embossed using a lovely sparkle silver
embossing powder – the petals were held with a brad.

These
poinsettia were then stuck to the top corner of the card
I added a
single clear gem to the centre of the large snowflake and then a
layer of PVA was added to the “fur” on the hat, pompom and
snowballs and then heavily covered with an iridescent glitter to
finish
I love this
card – hope you do too
See you next
time with another lovely card!
x
Monday, 17 September 2012
Here Kitty Kitty...
Hi
As I said
yesterday I made up lots of cards while away at the retreat – they
are all in bags sat waiting to be photographed – but who knows
where today went...so I just randomly picked a bag and took some
photos of the card to share for today...hope to do the rest in the
morning – at least I will be ahead with cards to share if I don't
find time every day
This is a
card made up from a lovely kit I bought from
www.cardmakingdownloads.com
There was no
designer info in the sheets but it was named
“Kitty
Over The Top Kit”

So this kit
had it all – the only thing I had to do was spray the main sheet
with Crafters Companion Stick and Stay and pop the sheet on to white
card

To make up
the card I folded the card in half then trimmed it all to size

After that
it was cut out the easy decoupage and add it using sticky pads

There is a
matching insert with the kit so that was added now.

For the
matching envelope I cut it out and scored on the fold lines –
double sided tape was used to put it together

The last
thing I did was the glittering!
This was
done using a generous amount of Cosmic Shimmer PVA glue around the
fur on the hat as well as the pompom then covered with the white
glitter....
Ok friends –
see you again tomorrow
x
Subscribe to:
Posts (Atom)