Thursday, 21 February 2013

Get Well Soon

Hello again my blogger friends
Now today's card is one I made a while ago – I have had all the photos ready but hing back as I made it for one of my class ladies Suzanne who had a fall in her home not sure if it was New Years Eve or the day before and sadly broke her hip
Naturally I set to – as did majority of my class ladies – and made a card to cheer her up – so as Suzanne follows the blog I didn't want to share it before she actually had it
We took a bag full of cards round to Suzanne's at the end of January as it was also her birthday
So to my card – all I can tell you now is that it was bought from Crafts You Print I have no idea as to the sheet name or number nor who the designer was – sorry!
So materials for this card I used ….
Heat mat to work on and protect your surface – I always use it...
A4 dark blue shimmer card
The printed main sheet
A few gems
Glossy accents
Crafters Companion Glitter Spray
Sticky pads
Eazi Score Board & tool
Tonic 8” guillotine
Scissors
Tweezers
Shaping tool from www.dimensionstamps.com
Foam shaping mat – stamping mat or even a mouse mat
To make the card …
The a4 card was folded to make the a5 card blank
The main image was cut from the sheet and attached to the card front with double sided tape
As is normally my way I left a narrow border all around the image.
And then came the cutting out – this sheet had loads to be cut out and some of it was quite tricky so I could see and forgive new card makers cutting off the tricky bits altogether!
As you can see on the card I printed Get Well soon in one of the spaces and added Suzanne to the pretty metal heart that hangs below the teapot of flowers
The decoupage was attached using double sided pads and I gently shaped all the top most pieces.
Pretty gems were added here and there to add glamour and glitz as much as anything then the whole card front was sprayed with Crafters Companion Glitter Spray for that WOW look.
Ok I know that in reality I didn't really do a lot to make this card mine – that has to be the biggest downfall with sheets from crafts you print – they are almost all cut and sticks – so the only personalisation that can be done is to add printed text as I did and then the gems and glitter spray
At the end of the day Suzanne was really pleased with it which was the aim of making it!
I had looked and looked for something pretty to make as a get well card and short listed around 6 but in the end I was really drawn to this one!
Hope you like it too.
Thanks for dropping by
See you again tomorrow friends!
x

Wednesday, 20 February 2013

Baby Boy Card

Hello blogger friends
I found out this afternoon that the lady who does my nails – Teresa – became a nana for the 2nd time on Sunday
Her daughter Fallon gave birth to a healthy little boy called Frankie.
Well it just so happens I get my nails done tomorrow and being organised for a change had already made the 2 cards I needed so went to put them in my bag so I wouldn't forget in the morning only to find there was only the one for the grandparents there.
So I searched and search – but have absolutely no idea as to where it might be – I know they were both put together – and I even have the photos from the missing card on my pc
So rather than keep on wasting time I just printed a sheet and sat cutting it out across teatime
Its now all put together so I thought I would make it my card for today as it does look pretty!
The sheet was by Janet Briggs and it came from crafts you print – I have it save as New Baby Boy so don't know if that's the correct name for the sheet – I may have changed it when I got it to make it easy to search for – your guess is as good as mine on it!
So materials for this card I used ….
Heat mat to work on and protect your surface – I always use it...
8x8 pre scored card blank
The printed main sheet
A5 piece of blue mirri card
3 different light blue papers
Oddments of blue card stock
blue gingham ribbon
card candy
Glossy accents
Sticky pads
Eazi Score Board & tool
Tonic 8” guillotine
Scissors
Tweezers
Shaping tool from www.dimensionstamps.com
Foam shaping mat – stamping mat or even a mouse mat
To make the card …
I folded the pre scored shaped 8x8 card then coloured the edges lightly with an applicator tool and tumbled glass distress ink.
A piece of dark aqua coloured card was used to mat a piece of blue swirly paper.
I stuck that panel along the fold edge leaving a small border.
I used a piece of text backing paper – just cut to a size that would fit in the card and then matted it to a piece of lovely pale blue shimmer paper – I'm sure there is a name for it but I don't know it!
This panel was stuck over the 1st panel and over towards the opening of the card
Double sided tape was used for the matting and for securing the panels to the card.
Finally I cut the main image from the sheet and matted this onto some blue mirri card and trimmed it to leave a small border.
This panel was positioned across the two other panels but staying close to the opening edge.
I came across a narrow piece of blue gingham paper so trimmed it and stuck a length of narrow dark blue gingham across it and secured to the spine edge of the card using sticky pads this time.
Using the same ribbon I tied a small ribbon bow but left the legs long – the bow was attached to the top of the ribbon order with a small sticky pad.
After all the decoupage was added it was time to decorate the card – I havent done much as yet because without really thinking I used baby blue stickles glue to colour the spots on the blanket which means I cannot do much else until that dries properly.
3 pale blue with stars card candy was added along the top left corner and bottom right corner to finish
I think this took me about an hour to make up – once I saw the sheet I knew it would be made up into a larger card and I really enjoyed making it
I'm so pleased I have a huge amount of the matt photo paper I use for my decoupage as well as a super printer that loves working hard for me!!!
I hope you like looking at this pretty card as I did making it!
Thanks for dropping by
See you again tomorrow friends!
x

Tuesday, 19 February 2013

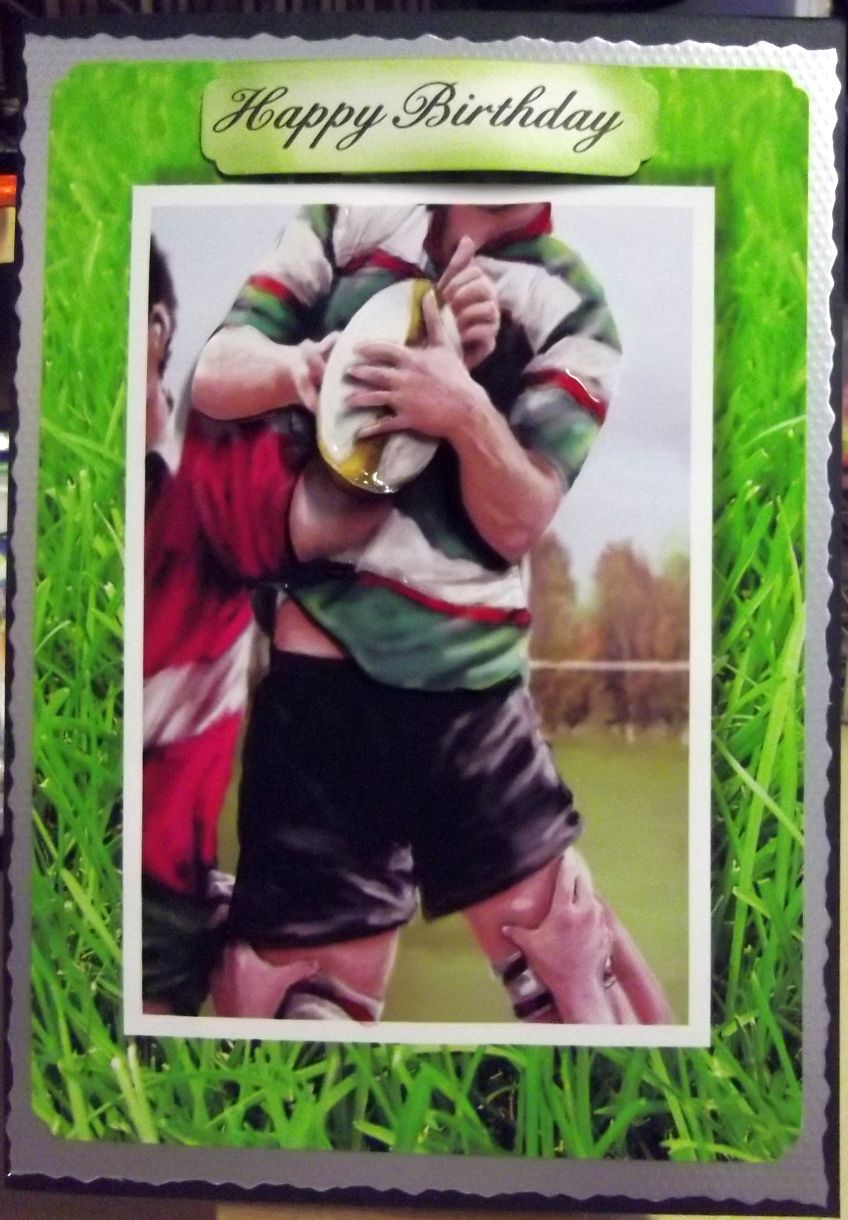
Rugby

Hi
Well I feel much better today – still not right but certainly on the right road – mind you I was in bed a little after 10pm last night and it was around 10.45 when I got up so the sleep probably helped a lot!
I have printed off loads of sheets from new cds as I like to try make at least one card from each and that how today's card came about.
I got the new cds from Digicrafts and made my card from the Give Him Another Squeezee cd – this cd is all male related and I love majority of the images. Now I am not a fan of these squeezee cards but the makers have started to add a folder called EXTRAs and in that folder you will find decoupage!
Do my card used one of the decoupage sheets – it was a card to a page really as it didn't need any backing
So materials for this card I used ….
Heat mat to work on and protect your surface – I always use it...
A4 dark green card
The printed main sheet
A5 piece of silver mirri card
Glossy accents
Sticky pads
Eazi Score Board & tool
Tonic 8” guillotine
Scissors
Tweezers
Shaping tool from www.dimensionstamps.com
Foam shaping mat – stamping mat or even a mouse mat
To make the card …
To start I folded the dark green card to make my A5 card.
I trimmed the A5 mirri card using a fancy edge cutter on all four sides
This was stuck to the main card base leaving the narrow border.
I cut out the base image then nipped the corner with a punch
The panel was then stuck to the card front.
I cut out the decoupage – with this cd you can do close to the edge decoupage which is my preferred way – or you can cut wide which offers easy option and still blends in well.
Once the few pieces were in place it was left to add the sentiment which was in my bit box – the sentiment was on white card so I quickly ran a distress tool with a mowed lawn around the edges – added large stick pads and shaped the centre
Glossy accents were used on the red areas – mainly his shirt and socks or where I felt the image was too flat
Card finished – and I ask you again- don't you agree this is a great rugby themed card – and it was really click print – cut and go!
I cannot rate this cd highly enough....I know sometimes we are in a rush for a last minute card – well next time be sure to look for this cd – Digicrafts Give Him Another Squeezee
The cd has golf, rugby, football,golf, bowls, motorbikes, garden scene and so much more
Its in the “use or sell” box...like 98% of al the cards are
Thanks for dropping by
See you again tomorrow friends!

Monday, 18 February 2013

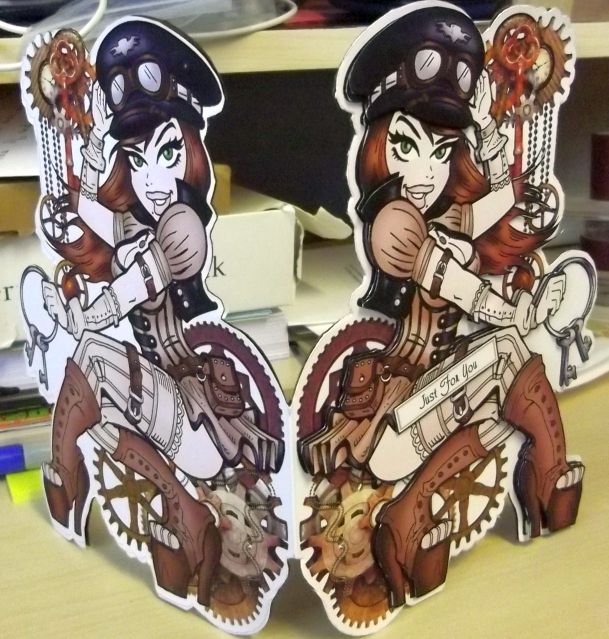
Capt Locke

Hi
I'm going to make this a quickie as I really don't feel too good – started with a cold on Thursday and today had next to no voice – but as the day has gone on I have started to feel feverish – thumping headache etc so I'm doing the blog – hot bath – and bed!
I actually made this card up a while ago because once I had the kit I just had to do it...its my kind of thing!
Right then, the kit is called Capt Locke Shaped Mini Card and was designed by Lisa Baglietto and was purchased from www.craftsuprint.com
So materials for this card I used ….
Heat mat to work on and protect your surface – I always use it...
A4 white card
The printed card and decoupage sheet
Glossy accents
Sticky pads
Eazi Score Board & tool
Tonic 8” guillotine
Scissors
Tweezers
Shaping tool from www.dimensionstamps.com
Foam shaping mat – stamping mat or even a mouse mat
To make the card …
I sprayed the back of the main card with crafters companion stick & stay then stuck the sheet to my white card stock
I scored along the pre marked score line the cut out the base card
Its so easy to cut as the main design has a white shadow all around it then to cut out it was just a case of cut on the black line
Once it was all cut out I folded the card in half to check it all lined up then cut out the decoupage and added those with small sticky pads.
There were 3 different sentiments but I decided to go with For Someone Special as this just isn't the card to give to just anyone – you need someone with a good sense of humour – someone not easily offended – having said that there isn't really anything offensive with the artwork – is there?
To finish I added dots of glossy accents here and there!!
So that is it – a great card for men in your life that have the sense of humour this deserves!
Its in the “use or sell” box...like 98% of al the cards are
Thanks for dropping by
See you again tomorrow friends!
x

Sunday, 17 February 2013

Spring Is In The Air


Before I go any further I thought I should say I had help and distractions while in the craft room today...Gizmo had to be brought in as there is a loose cat hanging around and both Gizmo & Polly would be vulnerable so put Polly on her indoor perch and Gizmo followed me to the craft room.
Today I thought I would share what was originally something for swap on one of the groups I belong to – then when I popped over to the CD SUNDAY BLOG I saw the theme and thought well done that girl – this fits that theme too!!!

I have used the paper and decoupage sheet from Debbi Moore fantastic new Garden Bookazine
All I will say is I cant wait now for the cds to arrive – I just adore her Shabby Chic cds anyway
I would never have thought I would hear myself say I loved something to do with gardening – but I do!!!
So for this piece of my artwork – I had to do something on a piece of heavyweight card that measured 6x6 – it didn't matter what materials I used – or how I decorated the card as long as it stayed at 6x6.
I had to make 3 and really enjoyed making them – I used some cheap mini easels to stand them on – they were from The Range and around 45p each I believe.
Onto the project then,..
So materials for this card I used ….
Heat mat to work on and protect your surface – I always use it...
heavyweight card 6x6
sheet of birdcage with flowers backing paper
The garden shed decoupage sheet
Amber coloured gems
2 small black AB pointed gems
Assorted flowersoft – both ultra fine and normal
Ranger black enamel
Glossy accents
Sticky pads
Eazi Score Board & tool
Tonic 8” guillotine
Scissors
Tweezers
Shaping tool from www.dimensionstamps.com
Foam shaping mat – stamping mat or even a mouse mat
To make the card …
I trimmed the card to 6x6 exactly and rounded the corners
After printing the beautiful backing paper in cream and lemon I decided I wanted to use the left side so I got the bird box and flowers around the top and down the left hand side – had I used the right hand side of the paper the bird house and flowers would have been down the right and along the bottom...somehow the birdhouse didn't look right at the bottom.
So the paper was stuck to the card and cut around.
I printed the decoupage sheet – I decided to use the octagonal shaped with the garden shed and it fitted perfectly in the space allocated for it.
Once the decoupage was added with small double sided sticky pads it ws down to the decorating.
I started by adding the lovely amber coloured gems to the centre of all the surrounding flowers. They were stuck using Cosmic Shimmer PVA glue.
I stuck a small black pointed AB gem on the bird box where the perch would normally be and decided to add the same as the shed door handle – not sure I made the right decision as it looks a little too big but if I try remove it now I know the paper will end up damaged so its there to stay!
On to the flower soft – I started off with the Ultra fine in a green colour for the trees and shrubbery – then a spring mix for the flowers in pots either side of the door and the 2 hanging baskets. The normal flowersoft in another shade of green was used against the 1st colour and finally I added some pale lemon to the wheelbarrow of shrubs.
To finish off I used glossy accents on the windows and door panes, flower pot and hanging baskets and then Ranger black enamel was added to the opening of the bird box.
I have the page on an easel next to me and its a lovely design..as I said this is to be sent away as part of a 6x6 swap but how lovely would this be put onto an 8x8 card for any gardener – male or female it would work for both!
Thanks for dropping by
See you again tomorrow friends!
x


Saturday, 16 February 2013

EVERGREENS


Hi
So as I mentioned yesterday – no card again
This time I thought I would give a local garden centre a plug
Ok its here in Hull but sadly people just by pass it and hardly notice its there
And that is a shame as its a family run business, and nothing is too much trouble
We popped in on Friday afternoon to see if they would like to rebook the birds of prey...we were welcomed, offered coffee which was proper coffee in a china mug too...
So while Pete talked business I took myself off for a wander through the gardens
This really is a hidden gem.
There are stone animals as well as some carved animals all set into the scenery
A small lawn lies in the centre of the walks – this is where they let their guests do their shows and things – a small pavilion is next to it – this is open when they have events on, all refreshment and home made cake is free.
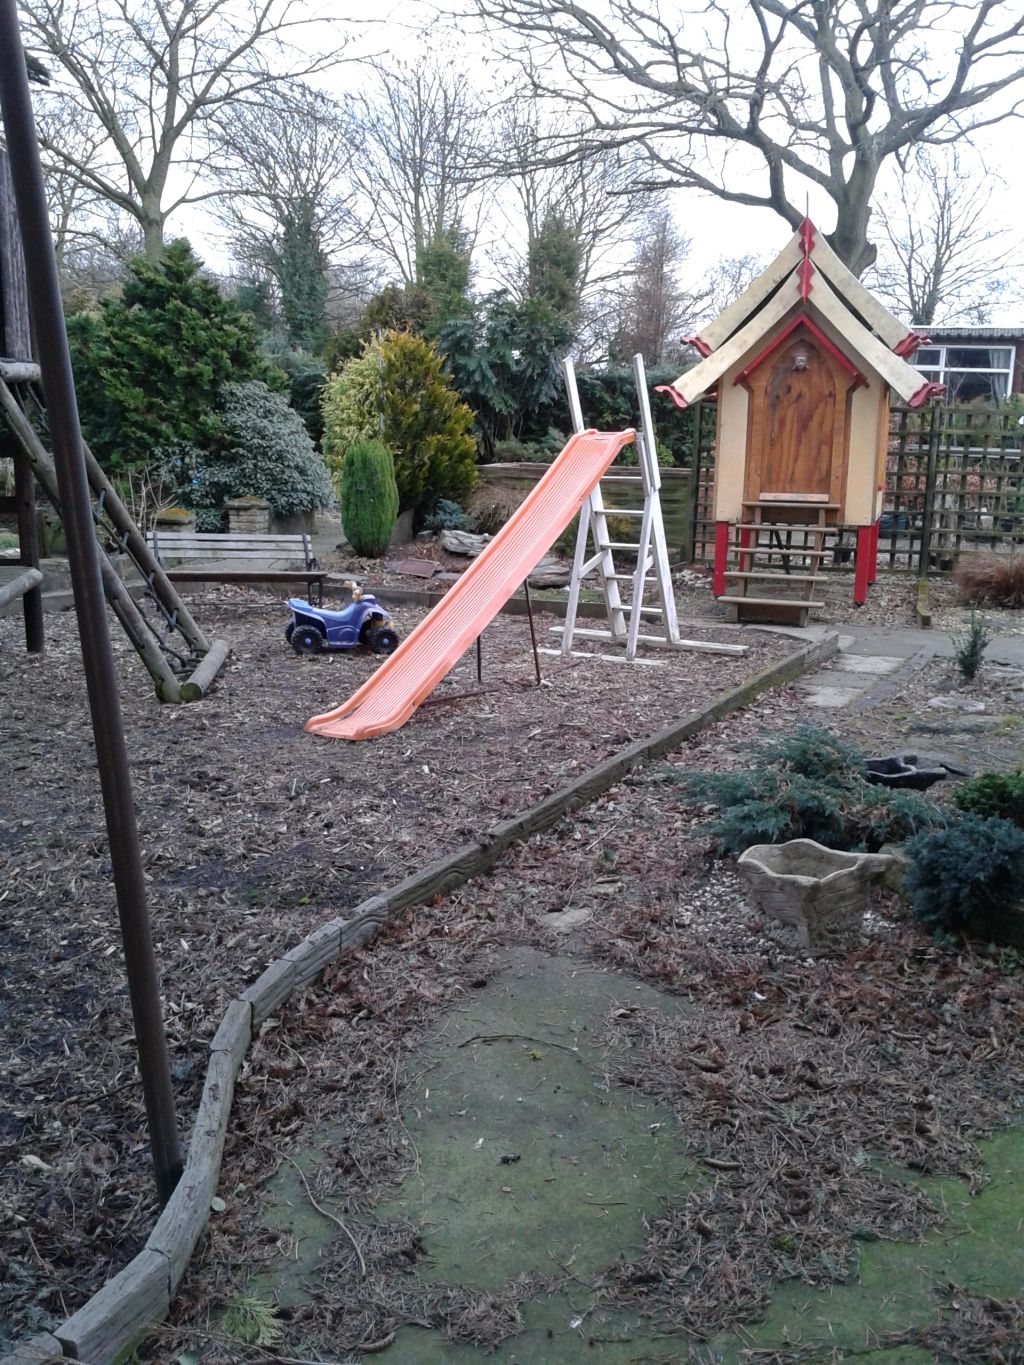
This year they have worked on a new play area for children – it has a tree house and big wooden play house as well as swings and slides
A large pond is now full of huge fish with an alligator making his way in...
At the end of the garden are two more pavilions, one is a static car boot – people can pop unwanted items in there to sell – all items open to offers and money goes to a local charity.
Onto the TLC corner – this is where you can buy a bargain tree, shrub or plant – they are all healthy but would benefit from some TLC – we never saw anything here priced over £4
The last pavilion hosts a huge snake winding in and out of the pot plants – it has been made of wood and beautifully painted and decorated.
Bird baths, bird tables, stools, water features, decorative pots, stepping stones, sun dials and much much more are on show as you head back to the main conservatory which is the shop base.
And in the shop they do small collectables as well as candles and crystals...
A flower shop is in here too – the prices are amazing – she had made up a gift bag with large teddy holding a red rose, sat on a plate and wrapped with love in cellophane and a huge foil bow to finish - £7.99 – I thought that was a bargain!!!
By now I should think you are eagerly waiting for the name of this garden centre aren't you?
Well is called EVERGREENS and is in BILTON near Hull – for those who know Bilton – the garden centre is directly across from the traffic entrance to Asda...
So next time you are in that area pop in and see for yourself!
Enjoy the photographs
Back with a craft project tomorrow – promise!
 I would love this scorpion for my garden!


 Can you see what's hiding in the bush above?


 I just love these hedgehogs...I didnt actually spot the 4th one...read the message to see what I am talking about!

X

Friday, 15 February 2013

Look at these....

Hi
Today I have decided I will share something different with you....in fact tomorrow will be something different too, just hope you don't mind!
As the weather was pleasant today hubby & I went out for an hour of five – he needed a few bits and pieces and I needed to revisit a garden centre we went to last weekend – I bought hubby & me a lovely china mug each – we both got a sheep one – well yesterday hubby was drying the mugs and dropped one!!
Normally I wouldn't bother replacing but you know what its like when you have a cuppa that is perfect – well that's what I thought about these lovely china mugs.
And so while out we came across something that was a huge interest to us and I just had to get photographs to share with you all.
This is a fantastic collection of Birds of Prey
For obvious reasons I wont share the location but will say they were stunning and had it not been feeding time I was told I could have stroked them all as they are all very friendly
Some are used for shows and school visits much like hubby does with ours and we were told these birds on nice days are tethered in the grounds of an old folks home – can you imagine the pleasure those folks will get from these beauties.


The above photos are of an Eagle – its hard to show how big and powerful he is – he is only 30 weeks only and was huge – look at the feet on him, and look at what's left of his dinner, not a lot but if you look at the size of the bones left you can get a better idea of his size.
And a Snowy Owl – this is the 1st time I have actually seen one – it was stunning – and I love this photo as it looks like it was laughing with me... I caught it mind squawk.


The rest of the birds are different Hawks, pretty birds but not a favourite of mine for some reason.


Now – look at this beauty! He is a 4 year old European Eagle Owl...his feathers were amazing – I really wanted to just pick him up and snuzzle him as I do my Gizmo....
I hope you have enjoyed looking at the photographs – I was so pleased with the quality of them as they were taken with my mobile – got better results than I do with my camera
Look forward to seeing you all tomorrow and sharing some photographs of somewhere else we visited and I fell in love with!
Take care my friends
x