Tuesday, 13 January 2015

Pretty Foxglove


Good afternoon

My card for today is something I started  last Thursday and for some reason got put to one side but I picked it over the weekend but then because I fell ill it was left until yesterday when it had to be finished so it could be posted even though I knew it would end up arriving a day late for a friend’s birthday.

The sheets were taken from a cd I am finding myself using a lot recently, it’s by Cupcake Crafting and is called Floral Delights. When I decided I wanted to use this pretty Foxglove set I printed out the pretty open centre insert but because I was so far behind I had to use a normal insert.

So to make the card I chose an A4 sheet of pale pink adorable scorable card, this is great card because the folds never crack, even when folded by hand or using a board and score tool. I had printed 3 different backing papers so I chose one and trimmed it to size allowing a narrow border all around the card using the deckle blade in my finger guard trimmer by Woodware (sadly this is no longer available) and stuck to the card using double sided tape.
 
I couldn’t decided between decoupage and pyramage, and due to time I opted for the pyramage, so I cut out all the pieces, punched the corners of the base layer with my nip punch and built them up using double sided sticky pads. This was then stuck to a mat of silver mirri card that also had the corners punched and was then matted onto a piece of cerise mirri card with the corners punched.
The completed pyramage topper was then stuck to the bottom of the card at an angle (my hands weren’t working too well and I was having trouble lining things up so using an angle covers the problem).

I used a flower shaped sentiment to which I ran a darker pink pro marker around the edges which made it stand out. This was attached to the top right side of the card with sticky pads. A tiny dot of cosmic shimmer pva glue was placed on each petal of the sentiment and I added some beautiful gems that were gold based but pink tops.

As I have taken to doing with this type of card I printed the page of teabag tiles and browsed a few sites on the internet for some different folds, and I played around until I finally settled for this one as it just looked pretty when completed. I used cosmic shimmer to stick the teabag medallion to the top left of the card and then dropped a blob of pva to hole in the centre and added a hot pink ab gem to it.

I think the card turned out better in the making than in my mind, I added a lovely verse and that was it, just hope my friend received it today and although a day late, she was happy with it

Back again tomorrow
Hugs
Angie
x

Monday, 12 January 2015

A Card For Harry!


Hi...

Last night I had a message from our new neighbour who came to me to learn how to craft, she said it was her sons birthday and she had been out and bought some embossing powder and an ink pad but wasn’t having any luck as the embossing powder was blowing off the design so I offered to loan her my heat gun but she said it was a little late to keep trying as she needed to have a card finished last night

So I had to make Harry a card- I looked at all the lovely files for boys things on my Cameo but they all needed endless cutting out and as it was already near 10pm I changed my mind.
 
This morning I went into a fab new cd I got called Harriet & More, the cd has digi images and coloured images as well as toppers and loads of other things, and the backing papers are fantastic. I selected a coloured digi image of a lovely little boy, print 2 backing papers and from another great cd gorgeous gifts for all occasions I printed out a sheet of hessian paper – this is the 3rd time I have used this paper.

I cut out the image and matted it onto a blue patterned paper, then silver mirri card, tan coloured spotty paper then gold card.
The hessian paper was cut down to fit the front of the card and about
2 cm round the back; this was secured using double sided tape.
 
Left over from the gold mat was a length that I measured and secured to the front of the card along the spine, then using a piece of green card I used a Martha Stewart border punch along both sides then used cosmic shimmer pva glue to stick this to the gold card.

The matted image was then stuck to the card front and a Happy Birthday sentiment had the edges coloured in green with a promarker before it was stuck to the card front.

Then to finish I cut a number 6 on my Cameo and attached it to the top of the card with a brown pearl brad

I popped the card through the door and around 20 minutes later I had a phone message of Harry proudly holding his card and he said thank you...that really made it worth making1

I do hope you like this card as much as Harry does, and if you want to know about the cds I used please just message me

See you tomorrow my friends
Hugs
Angie
xx

Sunday, 11 January 2015

Another Plate


Good evening

I’m a little late today but I haven’t felt too well, in fact this afternoon I went back to bed for a couple of hours and certainly feel better now but just wish this pain down my left side would clear up.

I was quite upset a day or two ago when I found that a card I made and posted for a swap hadn’t arrived and as it was posted just before the new year its not likely to arrive now.

So I set to yesterday and made a replacement, would have liked to do the same card but sadly couldn’t find it on my pc so chose this one instead

I believe the kit was by Craftygals and where I bought it from I cannot even hazard a guess sorry.

I cut out the scallop base and used Crafters Companion Stick & Spray to stick it to a piece of white card, I then sprayed the back with Pearly Pearl Mists to give a lovely shine without losing the picture.
I cut out the layers and used a deep pink pro marker to go around the base layer and also around the card itself to make it stand out and cover the bright white edges.


I used some Pinflare glue gel which states it is odourless but having just taken the card from the envelope it smells awful – so may have to start all over again! Anyway I used the gel to lift the layers instead of using sticky pads.
 
Once the plate was complete I cut out the 2 sides of plate stand and stuck 1 side to card cut it out then added the other side and again cut it out, I used the same promarker to colour the edges and sprayed both sides with the Pearl mist spray. Scored down the centre and that completed the stand.

To decorate the card I added some tiny gems in bright blue and amber to the flower centres and a larger black ab pearl in the centre of the large flower.
Orange Stickles was used to form the body of the butterfly and the centre of the big flower.
 
I decided to print the 2 pieces to form the envelope as it must be lovely receiving post in something so pretty, I took the envelope into Picasa and added the recipients name and address in the centre panel but also added “Card Only – No Cash Enclosed” to the bottom right hand corner and on the flap I added “Please Do Not Bend, Thank You”
So fingers and toes crossed this will make it!!!
 
I do hope you like the plate card, I enjoy making them and have so many different ones, an as I said I like the idea of a matching envelope too. 
Be back again tomorrow with one of the card I am working on that will hopefully be finished so I can share it with you


Hugs
Angie
x

Saturday, 10 January 2015

Using my new toy!!!


Hello again from a bright but windy and cold New Holland.

Yesterday my present to myself arrived, a Cameo 2...so naturally I was eager to get it set up so I could have a play, it’s an amazing piece of kit and much bigger than my old machine which is a Silhouette SD (I will now be putting that up for sale!)
And it is so easy to use – having said that I have only cut files I have bought through Silhouette as I have a direct debit for downloading files.
Although I have made a lovely card to replace one that I actually shared on here that Royal Mail managed to lose, I decided to keep that for another day and instead today share a couple of the new things I have cut on the Cameo

So first of these is a couple riding a tandem which I cut out of 12x12 pearl white Bazill card stock and simply added a piece of black Bazill card stock behind the cut out, and that is a card ready to go...how simple eh?

The next card is a pretty Thank You card, this was cut from pale blue pearl Bazill card stock. A very pretty doily type image with Thank You cut from the card centre and pretty daisies cut out around the sentiment.
Behind the cut out I added a piece of dusty pink card – the card was actually a piece left over from Colorcore Cardstock Coredinations card so its black on one side and pink on the other – ideal if you emboss it then sand over the black side with a sanding block.

On the daisies I simply added a 2mm ab gem.
And the last here is actually the 1st thing I cut after setting the machine up...The main card was black with pale pink background Colorcore Cardstock Coredinations card, this was the card and the base of the heart.
I then used a sheet of the same card in black with a dusty pink background.

To make this card up I folded so the inside was black and outer colour pale pink, used the black fancy mat with heart cut out corners, I stuck to the card with double sided tape.
The heart base was placed just below centre and stuck in place using       
 sticky pads to give some depth.
I turned over the black heart pieces and glued them in place using cosmic shimmer pva glue.

To stick the key I added a blob of pva to the back of my hand and just let the word droponto the glue moving the word as I went along.
The hearts were glued black side up as was the key.
I used a length of narrow white ribbon which I coloured with a red pro markers to tie a bow as the heart top had a hole either side to thread the ribbon, I slipped the key onto the ribbon before tying the bow.
I am so impressed with the Cameo 2 – one thing I found out was when the cutting is finished, remove the sheet from the machine and you design from the mat, when I cut the 1st card – the Valentine card I had set it to cut then went off to watch the soaps so it was about 2 hours before I came back and I really struggled to remove all the pieces from the cutting mat. I think that is why some of the pieces look a tad rough.
Lesson learnt!
Ok now off to have a nosey – the village pub is across the road from us, hubby is in the kitchen and just called me, there are in all 7 police vehicles around the pub and 2 police dogs – the population of our village in under a 1000 so maybe this is a tad overboard – or serious!!!
Will tell you what I find out in my next blog of the day
Hugs
Angie
x

Friday, 9 January 2015

Kiss Me Quick!


Hello

Well it’s been a very windy day here in New Holland and I believe it to be the same all over the country for today, hopefully it will die down soon.
Today I have made a Valentine’s Day card, I thought as I need to be making card to stock pile I may as well get a start on some Valentines.
I was browsing some files and folders a few days ago and came across a sheet by Paper Creator, check them out at
The sheet had 5 heart themed toppers in different sizes and then a small flower topper and a blank, I used the largest heart as well as the flower and blank panels

To make this card I used a sheet of A4 matt black soft touch card which was folded to make an A5 card. I am using the card in landscape for this design.

I covered the card front leaving a narrow border at the bottom and both sides with a backing paper that looks white on the photo’s, it is actually palest pink and has 3cm hearts all over it.
Using a sheet of normal black card I cut 3 panels which measured 5cm x 13cm, rounded the corners using the corner chomper and stuck them to the card, leaving a gap between each panel, then I used some white with red hearts backing paper, cut out 3 panels measuring 4.6 x 12.5 cms, rounded the corners and then stuck to the black panels using double sided tape.

The large heart topper was trimmed and matted with black card, the corners were rounded on both the mat and the topper, and I used double sided tape. The topper was then taped onto the 2 black panels at an angle.
The flower topper and blank topper were both trimmed down to 5cm square, corners rounded and matted to black card which was 5.4cm and again rounded the corners.

I used double sided tape to attach the black topper to the last long panel, I positioned it in a diamond shape style, then stuck the flower panel in the same way overlapping the blank topper slightly.

I searched my small sentiments box and found several useable things, a pink tag shaped sentiment saying Kiss Me Kick which I attached to the bottom right hand corned securing in place with a brad with a lovely black stone in the centre .

I cut down a sentiment so I was left with Love and this was added to the top of the panel above the heart, and in the corner of the heart topper I added a lovely cream pearl heart gem.

On the blank topped I glued a cerise pink mirri oval printed “With Love” in the centre then over the overlapping toppers I added “Be Mine” and finally below the flower was “I small heart U
To finish this card I simply added an amber coloured ab gem to the flower centre!
This card is so out of my comfort zone but I am determined to make more of MY cards...this was my 1st... What do you think to it please?
Well I had better get myself motivated as its time I was in the kitchen starting on the Korma for tonight’s meal
Catch up again tomorrow
Keep safe and warm
Hugs
Angie
x

Thursday, 8 January 2015

Ohh La La I'm Sending Smiles


Good evening

 Don’t know where today has gone, well I suppose I do really, this morning we had to go back over to the vets in Hull to return the agreement forms that had been stamped and signed. Got home and it was straight on the computer searching for a holiday...
Well the good news is I have it booked and paid for now, so I fly to Turkey on 12th June for 2 weeks..on my own....something nice to look forward to.
Now where did I hide those diet sheets lol

And on to the card I made for you today.
I used Ooh La La Everyday Occasions to print out the 2 backing sheets and the topper sheet.

The card blank was a sheet of A4 purple card that was scored on line 4, A4 gate on the blue Eaziscore Board
To make the card I cut out the topper that I thought looked lovely as it looks as though a pile of papers have gone all swishy
I matted this onto a piece of light purple card that had silver nuggets embedded in it. I used old X-Cut punch to punch the 4 corners and saved the heart cut outs for later.

Now I trimmed the backing paper with large flower heads so it fit inside the card, once I was happy with it I punched all 4 corner using a Martha Stewart punch called Bubble Bath. This was then stuck inside the card, I will die cut a shape and stamp a verse when I get the chance.
The doors of the card now – I cut 2 pieces of silver mirri card and attached a piece to each of the doors.

The backing paper with small bees was used to mat the silver mirri, once I had the correct size cut I punched the corners to match the sheet inside and stuck them in place.
The topper had double sided tape put just on the left side as that is what I attached to the left door.

I found a small lilac dufex type sentiment that went well with the card front, I also had a slither of card I used for matting so I trimmed it to 1cm wide, Next I used a scalpel to careful cut on the border of the sentiment at both sides, the cut lines were just wide enough to push the slither of card through. I trimmed each end of the sliver the cut out a V at both sides, like the topper I added double sided tape to the left side and stuck it just onto the bottom of the topper so it didn’t cover the punched corner.

I didn’t do too much decoration to the card as I think it looks pretty just as it is, I used a Sakura quickie glue pen to highlight the white sections of the box around the bear and sprinkled with fine glitter.
The 4 punched out heart shaped were then added to the 4 corners of the white topper using Cosmic Shimmer pva glue.
Hope you like the card
See you again tomorrow
xxx

Wednesday, 7 January 2015

Black Ladrador


Afternoon all

Don’t know about where you are but it’s so cold here in New Holland, thank goodness for central heating...will think about the bill once it comes in!
The card for today is something I took a long time working on as I needed it to be just perfect, it was made for a very special best friend.
The dog image was on a cd by Design House and I think it was called Canine Companions 1
My friend had a lovely black Labrador puppy for Christmas from her husband so to make the card personal to her I used the black Labrador image.

To start the card I used an 8x8 scalloped edge card from www.craftworkcards.co.uk and cut out a panel of backing paper that had the same dog image in the bottom right hand corner, the backing paper was stuck to the card using double sided tape.
I cut the topper down a bit as I felt it had far too much empty space above the dogs and when I was happy with the size I punched a border of paw prints across the top and then matted the finished topper onto a piece of silver mirri card.
The topper was then stuck to the top left of the card as I wanted to try keep the dogs on the backing paper clear.

On the topper sheet there was a passport sized topper so I stuck that to a piece of silver mirri card and punched the top of the mirri card with the paw punch.
This little topper was placed on the card, at an angle just about the dogs on the backing paper.
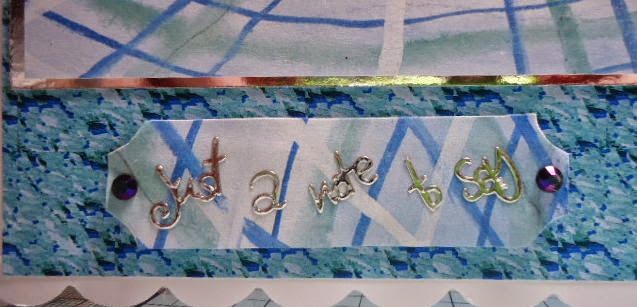
I cut out the blank sentiment bar and used silver peel off words to say “just wanted to say”. This was stuck under the main topper using sticky pads.

Using a length of black organza ribbon I tied a pretty bow and found a lovely rubber paw print brad so opened the legs and pushed the bow between them then closed the legs up and added to the space at the top right hand side of the card.
I was pleased with how it turned out and I knew it was perfect.
The insert had a long and meaningful verse which I won’t share as it was very personal to my friend and I, but it was printed as for an A5 card then the left over backing paper from the front was cut in half and a piece stuck to each outer edge using narrow double sided tape.

This made the insert perfect for an 8x8 card, I used some silver peel off borders to cover the join in the papers.
I have to thank another friend Suzanne for the tip on making an insert to fit an 8x8 card – ta chuck lol xx
And so we have finished another card
I’ll be back again sometime tomorrow with another new card but until then please keep warm
Hugs
Angie
x