Thursday, 5 January 2012

Red Poppies

As you may have noticed, I am making and sharing kits that I have bought from Crafts You Print

The reason for the kits is I have to make and send around 21 cards in January so what better way to decide what I am doing

This way I get the chance to try new kits and see what i like and don't like - and of course share them with you so you too can decide - like - dislike!

And the finished cards are not get stock piled as they are made for a reason - like many card makers, I love to make cards so have boxes full of ready made ones - that I rarely get to use so occasionally I pass a bundle over to help charity fund raising events

So today's kit from Crafts You Print is called

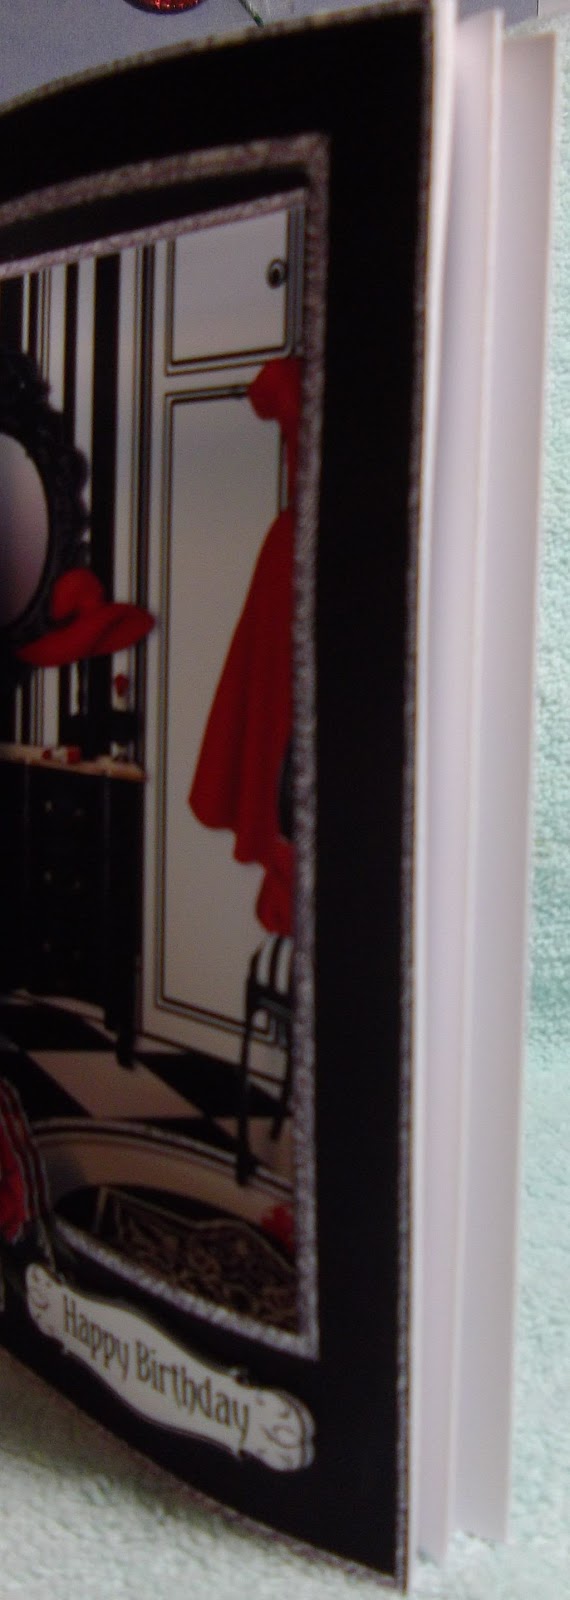
Red Poppies Shadow Box Kit


The kit has 3 main sheets and 2 sheets for the matching envelope.

I roughly cut out the elements from the sheets then stuck them to my white card stock - normally I would spray the full sheet and attach but I didn't need all the sentiments, and the decoupage poppies, bag and shoes as well as the back panel on card as they would have been too thick to cut out neatly.


So once I had everything cut out I scored the lines as indicated in the instructions - when I first read the instructions I was lost - but once it was all laid out in front of me it made perfect sense.

So the base layer has 5 score lines along the long edges which are valley and mountain folds alternately.

Once that was done and I had a sharp crease I added a length of double sided tape to the 1 fold line and attached the chair and rug which was in one piece - it was so easy to line up as the design was also printed on the fold line...


The shoes and bag decoupage was put on at this stage.

Next it was the front frame panel which pops over the top 2 scored edges - I used red double sided tape as I need a strong bond.

The poppies decoupage and the Happy Birthday sentiment were now put in place...

Lastly I stamped a sentiment onto the blank back panel and fixed in place with double sided tape.

The pretty envelope was simply 2 sheets printed, I cut them out and scored the outer edges, folded up and secured with double sided tape!

There is something special about this card - could it be the colours? Or the theme? I'm not sire - but I do know I like the card...do you?

Thank you for looking

Come back again soon....


Wednesday, 4 January 2012

Handbag & Shoes

Today's card is something I made up a day or so ago as I needed it to go in the post for my daughter in law

So this card is from a kit again bought from Crafts You Print

Handbags & Shoes Diamond Base 3D Card Kit by Sandie Burchell

This is a lovely kit and so easy to make - to start I printed the 3 sheets and 2 for the matching envelope.


As I print onto 128gsm matt photo paper I stuck the base layer onto 250gsm white card and cut it out

Next I cut out all the elements from the remaining sheets and scored all score lines - and cut on the suggested cut lines

Making the card up was easy and very straight forward

The main card is folded in half - valley fold

 The 2nd level is made up of 2 pieces that interlock and form a X shape - this has tabs on each side - so 2 push through slots on the back of the base card


The front layer is folded and positioned across the front - 2 tabs from the 2nd level then push through slots and this then holds the card together.

The last part of the card is to use brads - these were positioned along the outer edges - at the top and bottom of the tabs - and the back was covered by a small printed panel matching the front of that tab!


When you look at the card from the back you see the panel to write in as well as a decorative panel - and 2 tabs protrude from the bottom

When you look down on the card you can see why it is called a diamond base card


And the beauty of this kit - it lays flat for posting!


Even the envelope is quality when made up - the designer seems to go that extra mile to ensure the envelope is every bit as good as the rest of the kit!!


Thank you for looking....see you next time!


Tuesday, 3 January 2012

Mirror Mirror On The Wall....

This lovely card was another kit I purchased from Craft You Print....

The designer is Julie Green

And the kit is called Make Up Double Up Front Kit - phew - that's a mouthful!


So I started by printing out the 7 sheets - that was the card base, the insert, front and back of the envelope and then the panels and decoupage

I attached the card base to my card stock using the Crafters Companion Stick and Stay then cut it out, scored down the centre and used a bone folder for a sharp crease.

The main panel was cut out and attached to the front of the card base - I did this with collall photo glue.

Then the middle panel was all cut out, the sides were scored and creased well and I used the red high tack tape to securely attach this to the card - this section has the mirror on it - so I decoupaged the bow before I moved on.


Next was the front panel - this has the lipstick, mascara and eye shadows - so like the other panel I scored the sides and creased well with a bone folder before attaching with red high  tack tape....

The decoupage elements were put into place - including the bows at the top of the base panel and the Happy Birthday sentiment

To finish the card I used a soft grey pro marker to run along all the edges then Anita's 3d gloss was used on the mirror and the eye shadows, the mascara brush and the pink band of the lipstick


The insert was cut down and placed inside the card - all that was then left was the envelope which went together so easily - simply cut out both pieces, score on all lines, fold, add tape and attach!!!

The photos aren't too good and don't really show the smaller details - like the dots of coloured pva glue around the flowers in the centre of the bows...


The beauty of the card is it folds flat to go in the envelope save it getting damaged in the post

Hope you enjoyed this card

See you again tomorrow

x

Monday, 2 January 2012

Pink Brolly

The card for today is another kit that I have bought from Crafts You Print

This kit was made by designer Tina Fitch


Its a bit of a topsy turvy card really as it has gatefold doors but they open at the back!!!

So I printed the 2 sheets and then stuck both sheets to A4 cardstock and cut them out

Because I am really enjoying using embossing powders and experimenting I decided to heat emboss the decoupage elements...

So using a versamark pad and WOW clear embossing powder I triple embossed the butterflies and the Happy Birthday panel and the bow for the brolly as well as the 2 roses were just embossed once.


For anyone who doesnt know about triple embossing - you cover the area with your clear versamark pad, spinkle clear embossing powder, tap off the excess them heat underneath with a heat gun, once the powder has formed a glaze wait a few seconds and repeat, again heat underneath and then repeat for a third time - the finish is fantastic!!!

So to make up my card - I started by adding a piece of medium weight acetate to the back of the main card attaching it with small sticky dots

Then I added the 2 doors - this is easily done by scoring the overhanging flaps on the card front and the flaps on the doors - my first mistake was a silly one...I attached the first door with the decorated side showing outside the card - doh!


So removed it and attached them both correctly - makes sense really - why would I want to see white doors through the card front?

Next I added the decoupage with Pinflare Gel and for the sentiment I pierced a hole at either side and fixed gem brads to add that bit of bling!


Once I was happy that the Pinflare had dried I used my Cosmic Shimmer Pink Pearlescent PVA to add dimensional dots to the butterfly wings and the bright gold to the flower centres!

And that completed this lovely kit

Please feel free to leave comments, questions or suggestions

See you tomorrow

x

Sunday, 1 January 2012

Girly Girl Easel Card

Happy New Year

I wish you all the very best for 2012

Right - lets see just how good I am at sticking to my New Year Resolutions.....

For 2012 I am aiming to make and share at least ONE card every day which was what I intended when starting this blog!

So the 1st card for 2012 is this lovely kit from Crafts You Print by Amanda McGee - its called GIRLY GIRL BRACKET SHAPED EASEL CARD KIT


I started by printing all the sheets - which was the main card, the decoupage, the backing paper and then 2 sheets for the envelope.

I used my Crafters Companion Stick & Stay to attach the main easel card to a sheet of white A4 cardstock and then stuck the backing paper to the back - cut it out, scored and folded on the shown lines and put to one side.


Next I cut out the decoupage pieces and with the main piece fixing to the folded part of the easel base I decided to use the left over backing paper so it all looked pretty on the reverse.

The decoupage layers were positioned using Pinflair Gel and I did shape the top layers....

Now to the base - I used a Happy Birthday sentiment tab and attached the circular gem centred tabs to either side of the sentiment

The last thing I attached was a butterfly from the sheet but I really didn't like it so as I had used silicone it was easy to remove and in its place I used a dimensional butterfly.

Once I was happy with the card I used Anita's 3d Clear Gloss to give the mirror a shine as well as the decorations on the lipstick holder...

Lastly I added coloured gems to the circular tabs to add depth and of course it looks nicer than just the printed look!


The envelope was simply cut out, scored and folded then stuck together with double sided tape!

Hope you liked this project.

Wednesday, 28 December 2011

Special 21st Card Order

Hello again - long time no see I know...but hopefully 2012 will see me setting a goal and getting there!!

Anyway I had an email from a lady who had loved a Christmas card I had made her son (hubby's greenlaning pal) and for some reason I had added my made by stamp to the back of the card - so this lady asked if there was a chance I could make her a very special 21st birthday card for her to give her other son's girlfriend on her special day

And as always seems to happen - the dreaded sentence - BUT I need it before 31st December!! This was on 22nd December....

I hate letting people down so said I would do it and then set about with the WHAT CAN I DO? I asked my crafty friends for help - I had ideas galore sent my way but in the end I settled for a kit from Crafts You Print - its a Giant Easel Tableau Kit by Valerie Dawes

I normal print on the same setting - full page but past experience with these kits made me go down a size - so using WINDOWS PHOTO VIEWER I selected 20 x 25 cms for all 6 sheets

As my printer is temperamental when it comes to printing direct to card stock I used my matt photo paper then using Crafters Companion Stick and Stay attached the main sheets to white cardstock.

There was a lot of cutting out to do with this kit but it was easy cutting on the whole really...

I started to put it together in small sections and embellished each section before finally making up the whole card....

I used Cosmic Shimmer Coloured Pearlescent PVA glue to create pearly dots to the design but was so disappointed when the WHITE wouldn't do as it was told - instead of staying in dimensional dots it ran into blobby smudgy messes....so 3 times I ended up scraping it away and in the end settled for self adhesive pearls!!!

The blue and the burgundy dots went perfect and all in all I don't think it looked too bad using the pearls with the colours.

I used the fab ANITA's CLEAR 3d GLOSS to the centre of all the flowers, the orange segment in the glass and the whole of the keys. Large gems went on the top of the keys and the heart and I used blue and silver peel off letters to spell out Kerry Leigh and also the 21 inside the Happy Birthday heart shape.

Once it was all done I sprayed the card with Crafters Companion Iridescent Spray & Sparkle.

My friend Katie had bought me the new Enveloplus board from Crafters Companion for Christmas and she had helped me to make a box-a-lope so I decided this card needed to be boxed too...

As Katie had given me a 16" x16" sheet of white pearl card I used that and made the envelope with a 1/2" box side....WOW... I did it - all on my own too....I was sooo pleased....

I know its not that exciting to look at - but this is the front on my box-a-lope...


And this is the back view with the card inside and a post it note explaining how to seal it....


I know these piccies are almost the same as the finished card above but I am adding them anyway....


Honest opinions of the finished card gratefully recieved - as are any questions and comments!!

Thank you for looking and I do hope you enjoyed it!

Hugs
Angie
x


Monday, 19 December 2011

Christmas Assortment!

Hello

Its been an age since I last shared any cards - sorry but there just hasnt been enough hours in the day to fit in everything!

Ive been making the cards but not sharing them - as I am still struggling to get everything done I thought I would just upload loads of finished cards for you to view

Please feel free to comment or ask questions about any of them - I will answer them as I get them!

Hopefully in the New Year I will get myself sorted and start again - doing a card a day!

We can all hope...

x